Today’s training focused on some of the most important developer-level areas of WordPress:
How a theme is structured internally
How themes behave in Multisite environments
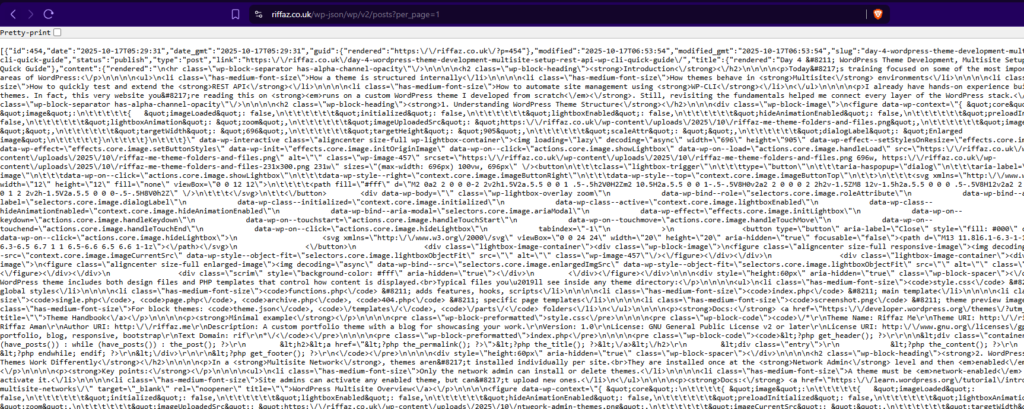
How to quickly test and extend the REST API
How to automate site management using WP-CLI
I already have hands-on experience building custom WordPress themes. In fact, this very website you’re reading this on runs on a custom WordPress theme I developed from scratch. Still, revisiting the fundamentals helped me connect every layer of the WordPress stack.
1. Understanding WordPress Theme Structure
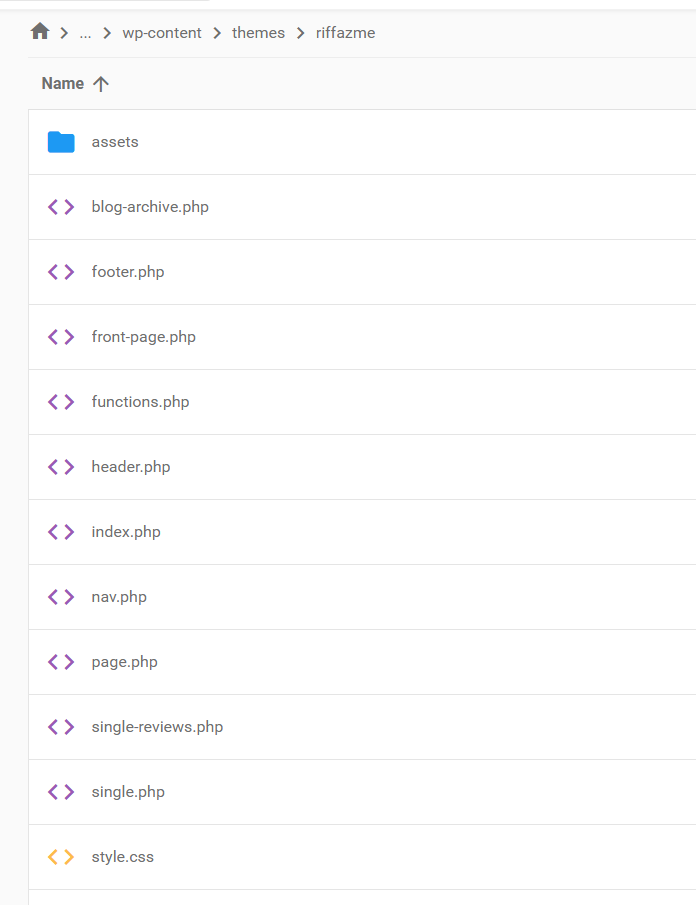
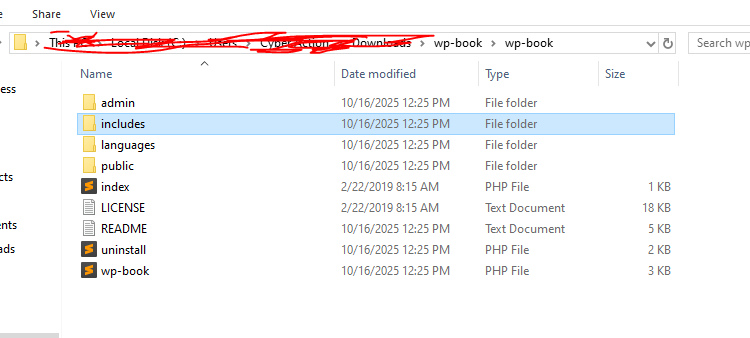
A WordPress theme includes both design files and PHP templates that control how content is displayed. Typical files you’ll see inside any theme directory:
style.css – theme info & global styles
functions.php – adds features, hooks, scripts
index.php – main template
single.php, page.php, archive.php, 404.php – specific page templates
screenshot.png – theme preview image
For block themes: theme.json, /templates/, /parts/ folders
/*
Theme Name: Riffaz Me
Theme URI: http://riffaz.me
Author: Riffaz Aman
Author URI: http://riffaz.me
Description: A custom portfolio theme with a blog for showcasing your work.
Version: 1.0
License: GNU General Public License v2 or later
License URI: http://www.gnu.org/licenses/gpl-2.0.html
Tags: portfolio, blog, responsive, bootstrap
Text Domain: rif
*/
2. WordPress Multisite – How Themes Work Differently
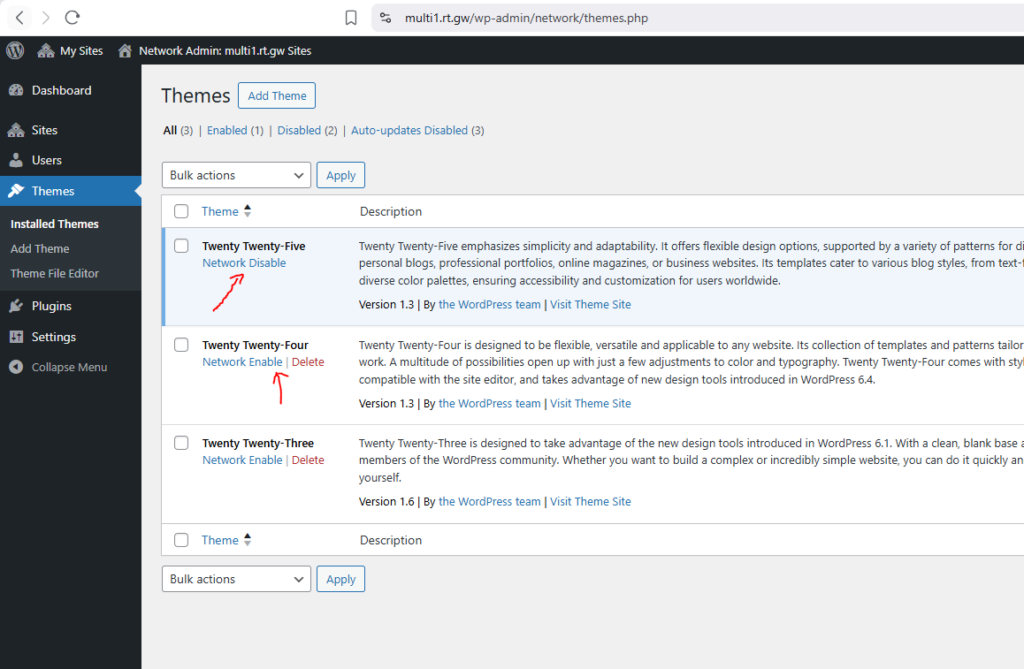
In a Multisite Network, themes aren’t installed individually per site. They are installed once at the Network Admin level and then enabled for each site.
Key points:
Only the network admin can install or delete themes.
A theme must be network-enabled before sites can activate it.
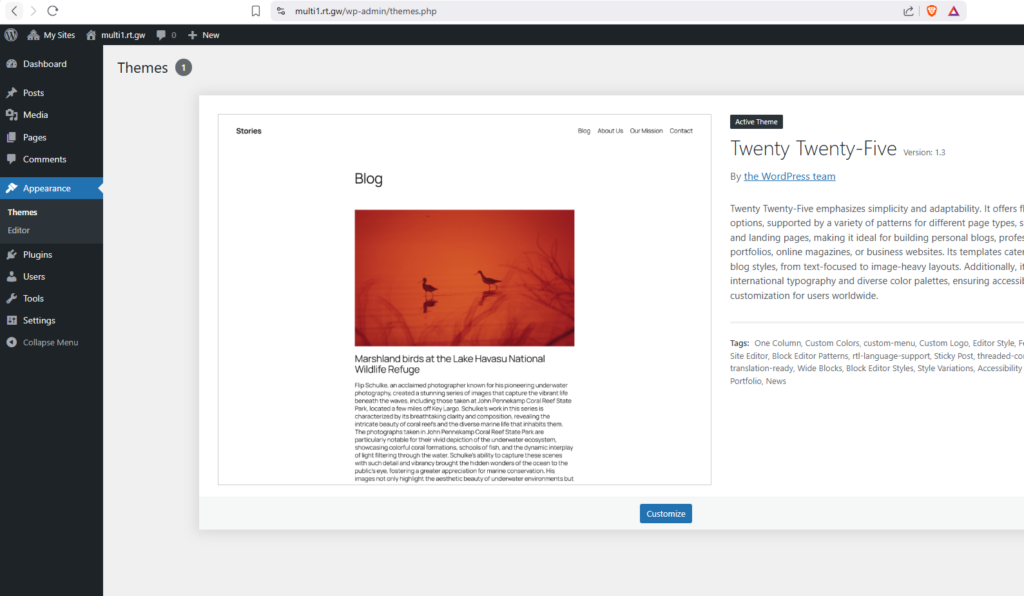
Site admins can activate any enabled theme, but can’t upload new ones.
In a Multisite network, themes are centrally managed install once, enable globally, then activate per site.
2.1 Creating and Using a Child Theme
A Child Theme is a lightweight theme that inherits all templates and functionality from another theme, known as the Parent Theme. It lets you customize or extend your site without touching the parent’s code, so your changes remain safe when the parent theme updates.
When to Use a Child Theme
You’re customizing a downloaded or premium theme
You want to override specific templates or styles
You plan to add functions or modify layouts without editing the main theme files
WP-CLI allows developers to manage WordPress installations directly from the command line, perfect for automation, debugging, and deployments.
Essential commands to try
wp --info
wp core version
wp plugin list
wp theme list
wp cache flush
wp user list
wp post list --post_type=page --fields=ID,post_title,post_status --format=table
Docs:WP-CLI Command List
What I Learned Today
I revisited the core theme files and finally understood how each one works together to form a complete WordPress theme. Seeing my own theme structure (riffazme) made it easier to relate theory to something I’ve actually built.
Then I explored how Multisite handles theme installation and activation. I never fully appreciated before how themes are managed at the network level and shared across multiple sites. A simple but powerful concept.
I also experimented with the REST API, fetching real post data and even registering a quick custom route. It’s amazing how a few lines of code can expose your entire WordPress data to external apps.
Next, I tried out WP-CLI the command-line tool that gives instant admin-level control. Listing plugins, flushing cache, and even adding custom commands felt both fun and efficient.
And to top it off, I realized this very website you’re reading is the best proof of my theme development experience. It runs entirely on my own custom theme.
Day 4 wrapped up with some of the most essential developer skills every WordPress engineer should master. From theme architecture to REST API and WP-CLI, these tools are the real foundation of professional WordPress development and exactly what I’ll be applying daily at any WordPress agency/company or beyond.
Today’s focus was on debugging WordPress effectively and understanding the core parts of WordPress development that every support engineer must know.
I began by learning how to turn on debugging safely using constants in wp-config.php, and then explored three powerful helper plugins, Query Monitor, WP Crontrol, and User Switching to track performance issues, manage cron events, and reproduce user-specific bugs.
After mastering debugging, I moved into core WordPress development:
creating a small plugin,
basic concept of creating plugins
custom post types
custom taxonomies
wp_query
This day tied everything together showing how WordPress works under the hood, and how to quickly troubleshoot, extend, and optimize any site with professional-level tools.
01. Defining Debugging Constants in WordPress
When working as a support engineer or developer, debugging is your best friend — but it should always be enabled safely. WordPress allows you to control what errors appear and where they’re stored using a few simple constants inside wp-config.php.
Add the following lines above the comment /* That's all, stop editing! Happy publishing. */:
define( 'WP_DISABLE_FATAL_ERROR_HANDLER', true ); // WP 5.2 +: show real fatal errors while developing

define( 'WP_DEBUG', true ); // turn on WordPress debug mode

define( 'WP_DEBUG_DISPLAY', false ); // hide errors from the browser

define( 'WP_DEBUG_LOG', true ); // log all errors to /wp-content/debug.log

define( 'SCRIPT_DEBUG', true ); // load unminified core CSS and JS files
What Each Constant Does
Constant
Purpose
WP_DISABLE_FATAL_ERROR_HANDLER
Disables WordPress’ built-in “white screen protection,” so you can view actual fatal errors while developing. (Only use this on local or staging environments.)
WP_DEBUG
Enables all PHP notices, warnings, and errors for WordPress and plugins.
WP_DEBUG_DISPLAY
Hides errors from the frontend or admin area to avoid breaking layouts.
WP_DEBUG_LOG
Saves all errors to /wp-content/debug.log, which can be opened in any text editor.
SCRIPT_DEBUG
Forces WordPress to use non-minified core files, making it easier to trace JS and CSS issues.
Where to View the Log
Open the file: example.com/wp-content/debug.log
You can also use a plugin such as Log Viewer or Error Log Monitor to read this log directly from the dashboard.
⚠️ Safety Notes
These settings are for development only.
On live sites, set WP_DEBUG and SCRIPT_DEBUG to false, and remove the fatal-error-handler line.
Clear or rotate the debug.log regularly to prevent it from growing too large.
Combine this setup with plugins like Query Monitor or WP Crontrol for a complete debugging workflow.
02. Helper Plugins for Debugging in WordPress
There are certain WordPress plugins that make it much easier to debug PHP errors, actions, filters, enqueued scripts and stylesheets, and even HTTP requests. In this section, we’ll go over three essential ones Query Monitor, WP Crontrol, and User Switching and see how each helps during development and troubleshooting.
Checked for slow database queries and heavy hooks on page load.
WP Crontrol
Lets you view and manage cron events and scheduled tasks.
Disabled duplicate or unnecessary cron jobs during testing.
User Switching
Quickly switch between users without logging out/in.
Reproduced role-specific bugs (Subscriber vs Admin) safely.
Query Monitor
Query Monitor adds a complete developer tools panel inside WordPress. It lets you inspect almost everything happening behind the scenes:
Database queries (with execution time and source)
PHP errors and notices
Hooks and actions currently running
Enqueued scripts and styles
REST API and Ajax calls
HTTP API requests and responses
Block Editor blocks and capability checks
The plugin automatically adds a toolbar entry in the WordPress admin bar; click it to open detailed tabs for each section.
Why it’s useful Query Monitor instantly shows slow database queries or heavy hooks, helping identify performance bottlenecks. It’s a must-have in every development or staging site.
Here’s a brief introduction about the plugin and what information it displays and where:
Anything consistently over 0.05 seconds per query or memory use above 64 MB on simple pages is worth optimizing.
Example
“If a plugin is making 40 duplicate queries per page. Disabling it cut load time from 2.5 s to 1.3 s.”
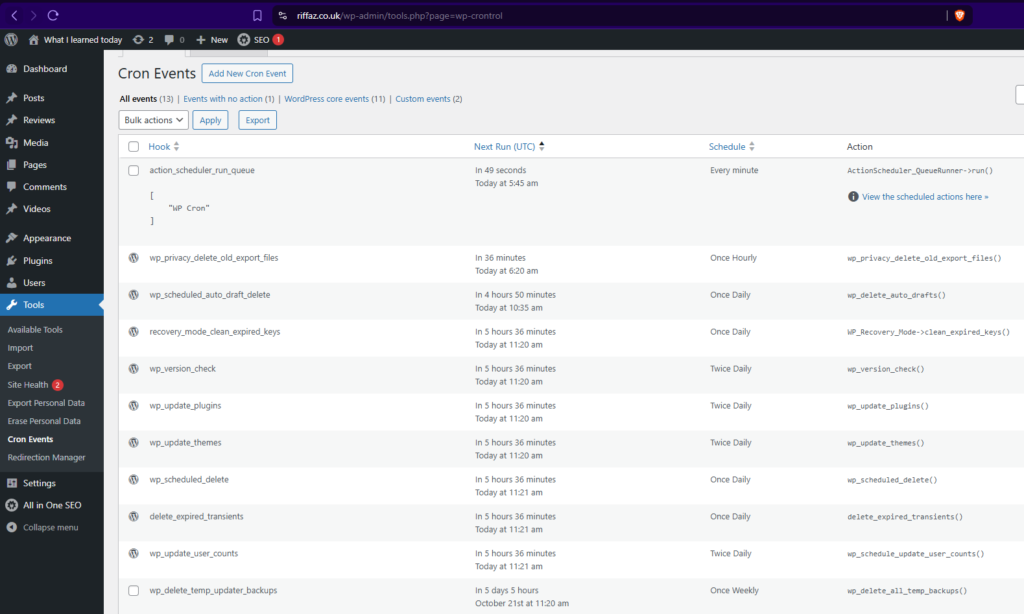
WP Crontrol
WP Crontrol allows you to view, manage, and debug WordPress Cron events directly from the admin area. From its interface you can:
View all cron events with their hooks, arguments, recurrence, and next-run time
Edit, delete, or immediately run any event
Add custom cron events or custom schedules
Bulk-delete unwanted events
Export cron events to a CSV file
Why it‘s useful This plugin helps verify whether scheduled tasks (like emails, imports, or backups) are running properly. A common cause of “nothing happens” issues in WordPress.
You can read more about WP Crontrol on its plugin page.
User Switching
User Switching lets you instantly swap between user accounts without logging out and back in. Normally, testing as a specific user means resetting passwords and logging in manually; this plugin saves all that time.
Helpful when:
An issue appears only for specific users or roles (e.g., “Subscriber can’t see button”)
You need to test restricted content, membership, or checkout flows for different roles
Just click Switch To under any user in Users → All Users, and you’ll be logged in as them instantly. A single click restores your original admin session.
After completing the debugging and helper plugins session, I took a short lunch break. Once back, I moved on to the Basic Plugin Development module starting with how plugins are structured, how to register them properly, and how WordPress hooks (actions and filters) connect everything behind the scenes.
03. Basic Plugin Development – Quick Start
Before diving into the deeper APIs, I focused today on understanding how plugins are structured and how hooks connect everything inside WordPress.
I began with a quick hands-on experiment using an MU-plugin to understand how WordPress executes hooks, and then gradually explored how actions and filters form the core of every plugin.
Understanding Hooks with an MU-Plugin
Before building a regular plugin, I tested how WordPress triggers hooks internally by creating a small MU-plugin (Must-Use Plugin). MU-plugins load automatically on every request, making them perfect for experiments and debugging.
Steps followed:
Created a new folder: wp-content/mu-plugins/
Added a file: wp-content/mu-plugins/hook-watcher.php
hook-watcher.php
<?php
/**
* Plugin Name: Hook Watcher (MU)
* Description: Logs every hook that fires — for learning purposes only.
*/

if ( ! defined( 'ABSPATH' ) ) exit;

// Extremely noisy — use only on local environment
add_action( 'all', function ( $hook ) {
 error_log( $hook ); }
);
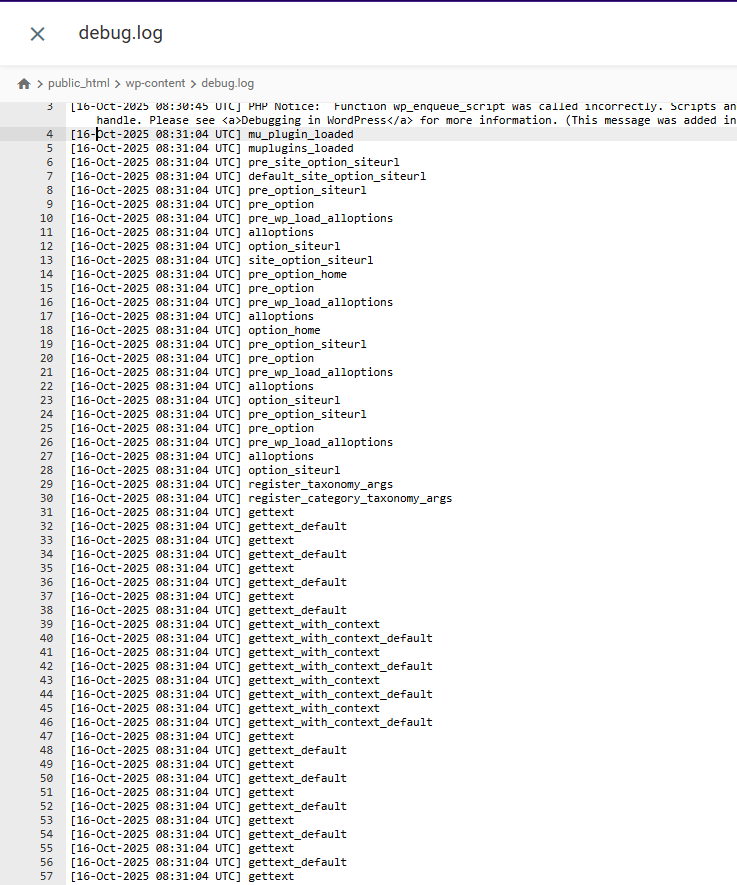
With WP_DEBUG_LOG enabled, this script records every WordPress hook into /wp-content/debug.log.
What I Observed
Opening the log showed a long list of hook names like:
🧩 3. Hooks – Actions and Filters
Hooks are the backbone of WordPress extensibility. They allow plugins, themes, and even core to “talk” to each other.
Effect: This replaces every rendered block on the site with a random image from Picsum. It clearly shows how a filter can intercept and modify the final output before display. (And yes, remove this after testing 😄)
💡 Ideas to Explore
1️⃣ What is the purpose of add_action() and how is it implemented? add_action() attaches your custom function to a hook so it runs at a specific moment.
Use priority to control the order when multiple functions are attached to the same hook.
✅ Summary
MU-plugins are great for quick experiments and debugging.
add_action() runs your code at a specific point.
add_filter() modifies data before it appears.
do_action() and apply_filters() are what actually fire those hooks.
Priority lets you decide the order of execution.
Together, these form the core foundation of how every WordPress plugin works.
04. Custom Post Types and Taxonomies – Quick Run
With limited time left in the day, I did a short but practical run on Custom Post Types (CPTs) and Custom Taxonomies. Two features that make WordPress flexible beyond posts and pages.
1. Custom Post Types
A Custom Post Type lets you create new types of content. For example, Books, Projects, or Reviews, each with its own editor and structure.
You register a CPT using the register_post_type() function, usually inside a plugin or in functions.php.
Defines all text displayed in the admin for this CPT (name, add new, edit, etc.).
public
Makes it visible on the frontend and admin menu.
has_archive
Creates an archive page like /books/.
rewrite
Defines custom URL slug for the CPT.
supports
Enables features like title, editor, thumbnail, etc.
show_in_rest
Enables block editor and REST API support.
menu_icon
Sets a custom icon in the dashboard menu.
👉 In short:labels control the text users see; args control how the post type behaves.
2. Custom Taxonomies
A taxonomy groups related posts together. For example, genres for books or skills for projects. WordPress includes two default taxonomies: Categories and Tags, but you can create your own.
Custom Taxonomies group content within those post types.
Use them when default categories/tags don’t fit your structure.
05. WP_Query – Custom Queries in WordPress
I also did a quick review of WP_Query, the main class that controls how WordPress retrieves posts from the database.
What is WP_Query?
WP_Query is the core query class that WordPress uses to fetch posts, pages, or custom post types based on specific conditions — for example, only posts from a certain category, author, or date range.
It gives developers complete control over which posts are displayed and in what order.
Today everything started to click. I began the morning by setting up proper debug constants in wp-config.php, and for the first time, errors were neatly written to debug.log instead of cluttering the screen.
Then came my first MU-plugin, a little “hook watcher” that logged every WordPress hook. Watching hundreds of hooks fire in sequence was fascinating and made me realise how many moving parts build a single page. (I quickly deleted it before the log exploded 😄.)
I also tried a few helper plugins: Query Monitor for tracking slow queries, WP Crontrol for checking cron jobs, and User Switching to test different roles, all simple but powerful tools for real-world debugging.
After lunch, I experimented with actions and filters. That’s when things really made sense, actions let me do something, while filters let me change something. I even tried the render_block filter trick that replaced all blocks with random images funny, but eye-opening.
Some of these things I already knew. I learned a lot of this when I built my own plugin Clean Checkout for WooCommerce. But this time, the structured approach in the training helped me connect all those pieces together and understand why things work the way they do.
To end the day, I quickly created a Custom Post Type (“Books”) with a Genre taxonomy, then explored WP_Query and how it differs from get_posts() and query_posts(). Now I finally understand how WordPress fetches, organizes, and displays content not just how to fix it.
Tomorrow’s plan: dive into Theme Development and the REST API basics to tie everything together.
As part of my WordPress Technical Support Engineer Training, after completing the environment setup on Day 1, today’s focus was to install and configure a full-fledged Integrated Development Environment (IDE) using Visual Studio Code, set up Z Shell (Oh My Zsh) for a faster command-line workflow, and explore the basics of Git and SVN.
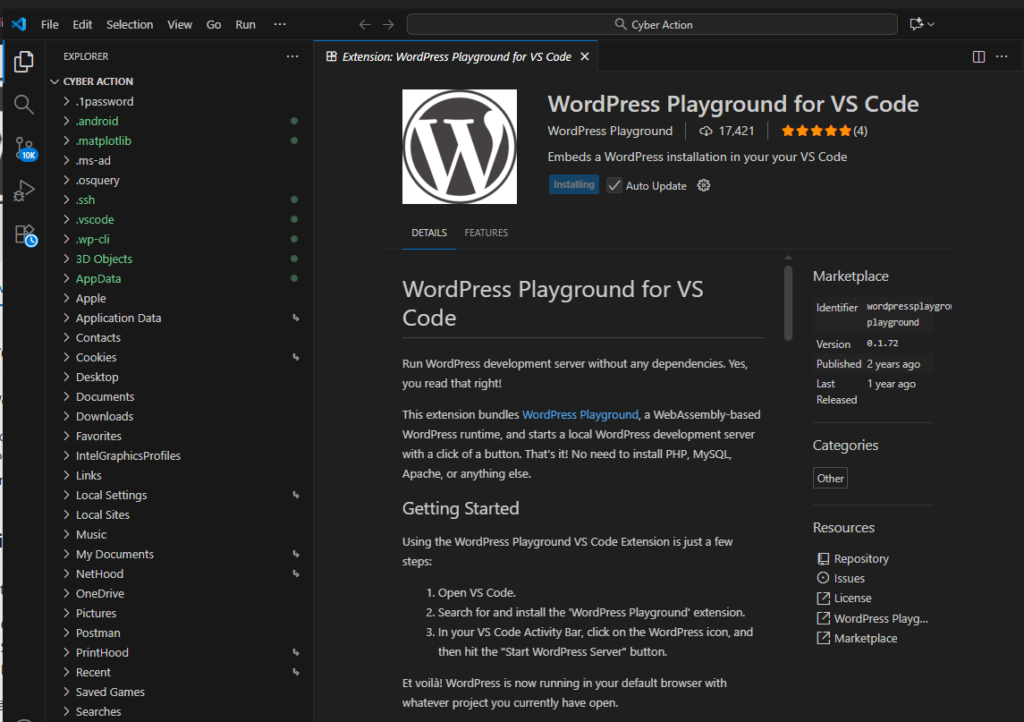
2️⃣ Installed essential extensions for WordPress development: https://marketplace.visualstudio.com/items?itemName=WordPressPlayground.wordpress-playground
WordPress Playground (launch WordPress instantly inside VS Code)
We can install the following extensions too if we need:
PHP Intelephense
Prettier – Code Formatter
GitLens – Git super-charged
ESLint
Markdown All in One
Live Server
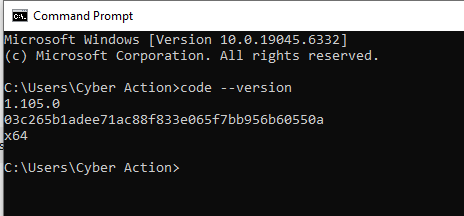
3️⃣ Verified installation via terminal:
code --version
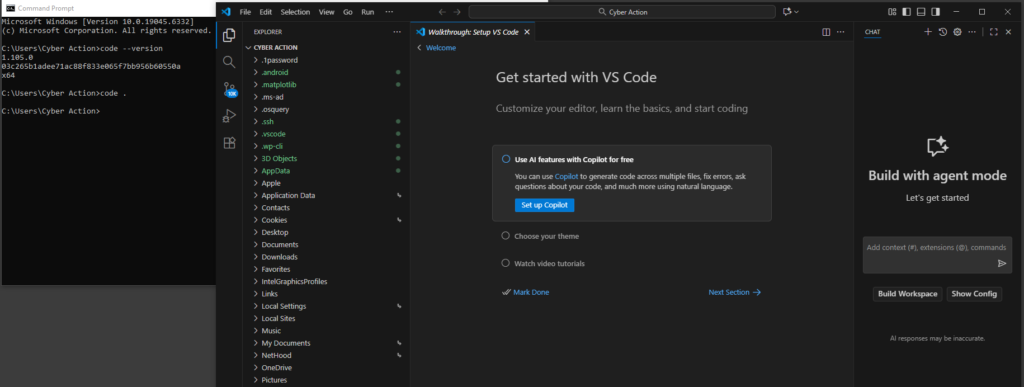
4️⃣ Opened the local project folder directly in VS Code:
code .
2. Using WordPress Playground Extension
The WordPress Playground extension lets you spin up a full WordPress site inside VS Code without installing PHP or MySQL.
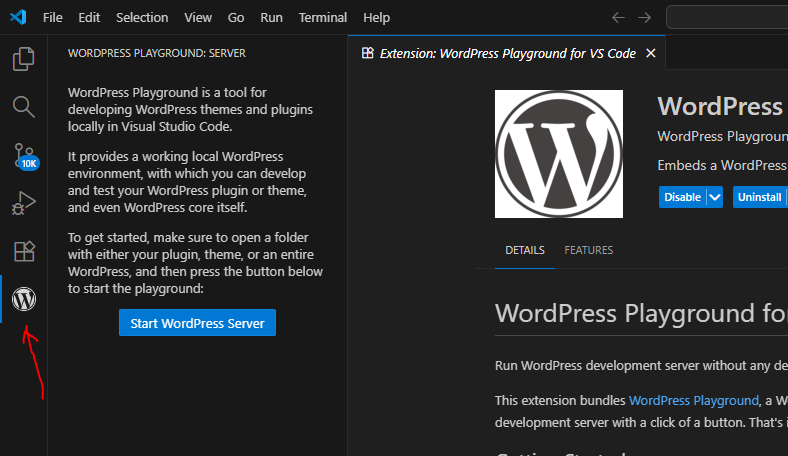
Steps:
1️⃣ Open VS Code → Extensions → Search WordPress Playground → Install. 2️⃣ Click the WordPress icon in the Activity Bar. 3️⃣ Select Start WordPress Server. 4️⃣ It opens your project in a browser with a live WP environment. This is perfect for quick plugin or theme testing.
” If the extension doesn’t start on Windows, keep LocalWP as a fallback that we created in day 1.
3. Setting Up Z Shell (Zsh) and Oh My Zsh
To improve terminal speed and readability, I installed Zsh and configured Oh My Zsh for plugins and themes.
Installation commands:
sudo apt install zsh -y chsh -s $(which zsh)
Install Oh My Zsh:
sh -c "$(curl -fsSL https://raw.githubusercontent.com/ohmyzsh/ohmyzsh/master/tools/install.sh)"
For windows:
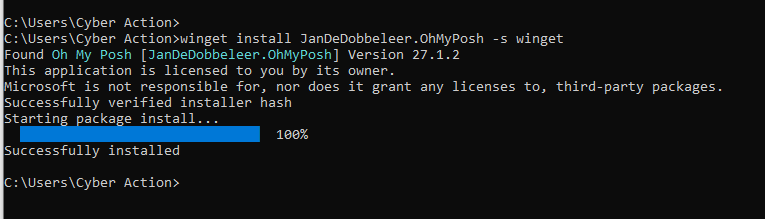
Zsh is does not natively support Windows. Instead, we can try Oh My Posh.
In short:
🧩 Zsh & Oh My Zsh → Need Linux/macOS or WSL.
⚙️ Oh My Posh → Windows-friendly equivalent with similar benefits.
winget install JanDeDobbeleer.OhMyPosh -s winget
Recommended plugins (I did not try these but good if you want to explore a bit):
git
z
autojump
zsh-autosuggestions
zsh-syntax-highlighting
Feature / Aspect
Zsh (Z Shell)
Oh My Zsh
Type
Command-line shell (replacement for Bash)
Framework / configuration manager for Zsh
Purpose
Provides an enhanced shell environment
Simplifies managing Zsh configuration, themes, and plugins
Installation
Installed as a standalone shell using package manager (sudo apt install zsh)
Installed after Zsh via a curl or wget script
Default Features
Basic improvements over Bash: better tab completion, spelling correction, globbing
Ships with 100+ themes and 200+ plugins pre-configured
Configuration File
Uses ~/.zshrc (manual editing needed)
Also uses ~/.zshrc, but auto-populated with friendly defaults
Managed via simple edits — enable/disable plugins and themes easily
Themes
None by default (plain prompt)
Comes with many built-in themes like robbyrussell, agnoster, powerlevel10k
Plugins
Must install and configure manually
Includes plugin system — just add names in plugins=(git z ...)
Ease of Use
Requires manual setup and knowledge of config syntax
Ready-to-use immediately after install; beginner-friendly
Performance
Slightly faster since it loads fewer scripts
Slightly slower at startup because of extra plugins and themes
Best For
Power users who want full control
Developers who want a quick, beautiful, and feature-rich shell
Example Installation
sudo apt install zsh
sh -c "$(curl -fsSL https://raw.githubusercontent.com/ohmyzsh/ohmyzsh/master/tools/install.sh)"
Zsh vs Oh My Zsh
4. Introduction to Git and SVN
I explored how Git and SVN work, focusing on core commands. I already covered Git and Git CLI installation yesterday here
Git basics:
git init
git clone <repo-url>
git add .
git commit -m "Initial commit"
git branch feature
git checkout feature
git merge feature
git push origin main
SVN overview: SVN is centralized version control, while Git is distributed. Understanding this helps when working with older WordPress plugin repositories that still use SVN for releases.
🧭 Course Relevance Note
While exploring today’s and yesterday’s topics, I realized that some sections such as NVM, Composer,Zsh setup and the Git commands and Git quiz are more developer-oriented than necessary for a WordPress Technical Support Engineer.
These parts are useful for developers who:
Commit code regularly
Work inside CI/CD or staging environments
Handle pull requests or deployments
However, since a support engineer’s main focus is troubleshooting, debugging, and communication, (sometimes providing small qucik PHP snippets) these topics are not essential for daily work. So, I decided to skip those for now and continue focusing on the areas that directly strengthen technical support skills.
📘 Additional Module
After wrapping up the main tasks of Day 2, I also completed the Web Basics module, which covered:
Domain Name System (DNS)
HTTP / HTTPS
How the Web Works
Browser and Rendering Engines
Web Servers
Emails
Since I already knew many of these from past experience, it served as a quick refresher and took about an hour.
For readers unfamiliar with these topics, you can simply google these topics.
📮 Note for WordPress devs and testers: You can use MailPit locally to capture outgoing emails (contact form notifications, WP emails) without sending them externally. It’s a safe and practical tool for testing.
💡 What I Learned Today
A proper IDE setup makes daily WordPress work smoother and saves a lot of time.
WordPress Playground can instantly launch a test site inside VS Code without any server configuration. This is ideal for quick plugin or theme checks.
Zsh / Oh My Zsh are optional for support engineers; helpful for command-line comfort but not mandatory.
Git knowledge is useful but not essential for roles that don’t touch codebases or deployments.
The key takeaway is to focus learning on debugging, troubleshooting, and communication, rather than deep developer workflows.
A real-world onboarding journey showing what engineers actually do and learn, step by step, from setup to debugging.
Introduction
Day 1 marks the start of the technical phase of this onboarding journey. Today’s focus was on building a consistent development environment, the foundation that every support engineer needs before working on real-world issues.
Even after years of experience in WordPress support and plugin development, I found this phase refreshing. It reminded me that structured setup and common tooling standards are what make a team’s debugging and deployment workflow faster and more predictable.
This post documents how I aligned my own environment with the agency (I joined) recommended stack from installing NVM and Composer to configuring Z Shell and LocalWP in a hybrid style that shares both steps and real-world insights.
Tools Installed & Configured
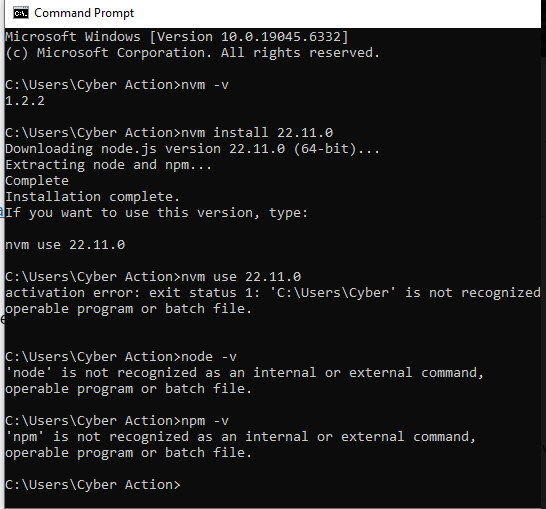
1. NVM & Node.js (v22.11.0)
Installed Node v22.11.0 using NVM for version control.
Confirmed autoloading paths work with WordPress plugin structures.
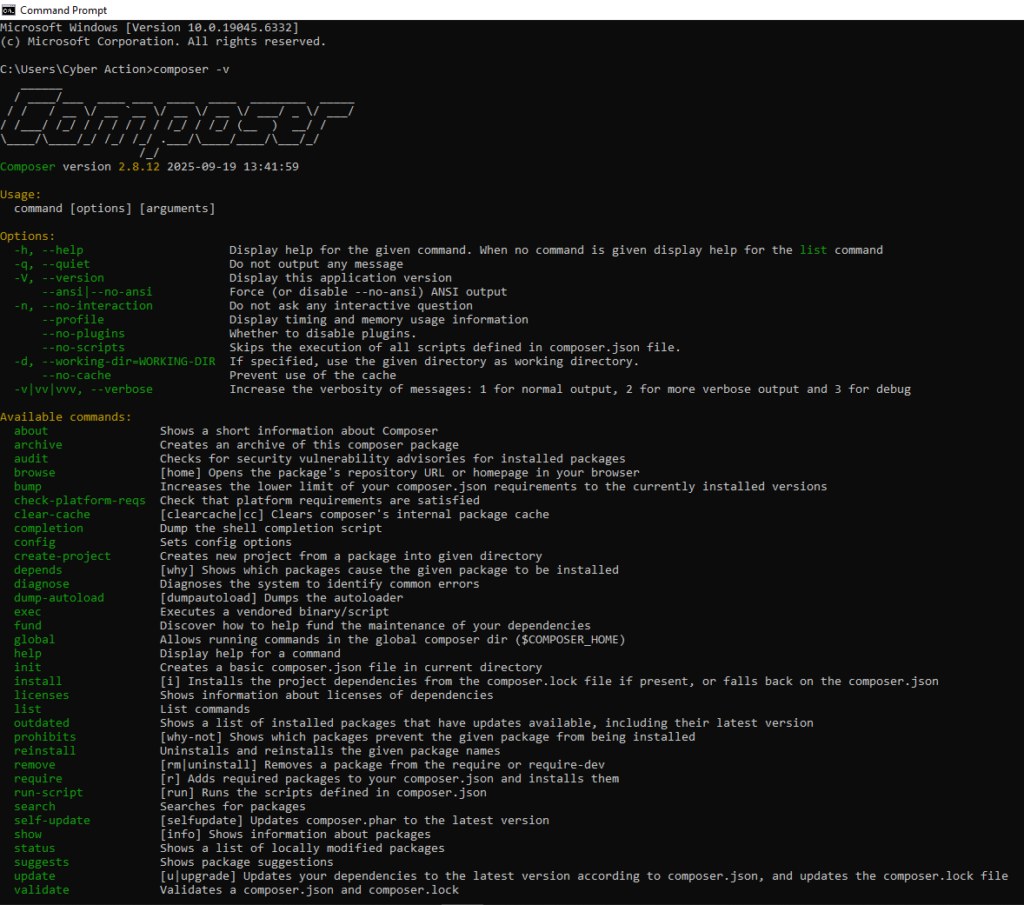
What is Composer and Why It Matters
Composer is a dependency manager for PHP – it helps you install, update, and manage PHP packages or libraries that your project needs.
Instead of manually downloading ZIP files or copying PHP libraries, Composer automatically installs and keeps them updated through a file called composer.json.
For WordPress engineers, Composer is especially useful for:
Installing tools like PHP_CodeSniffer and WordPress Coding Standards (WPCS).
Managing third-party PHP libraries for plugins or themes.
Keeping local development environments consistent across projects.
Think of it as your project’s package manager, similar to npm for Node.js but for PHP.
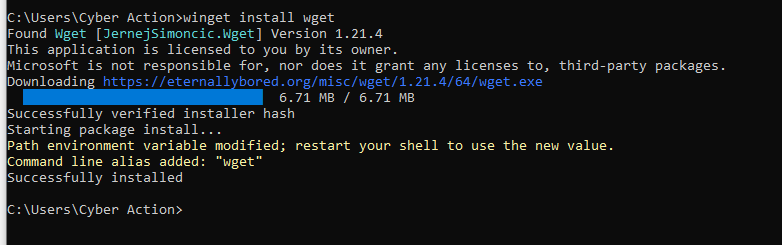
3. WGET
Installing wget on Windows
I installed wget using:
winget install wget
This will install the wget regardless your region’s Microsoft Store source.
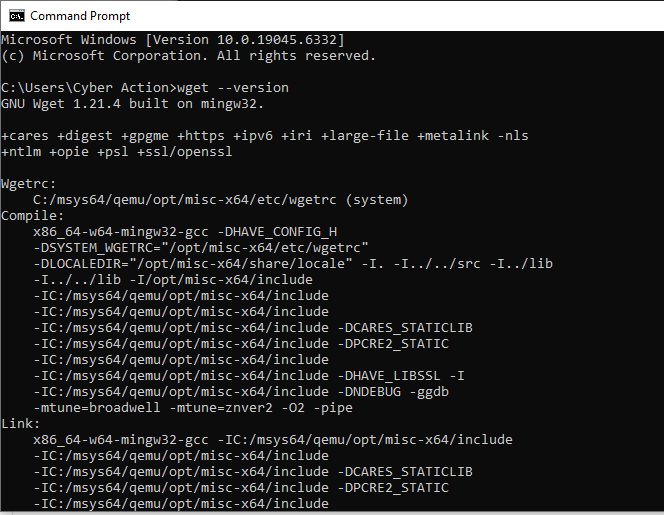
After installation, I restarted the terminal to refresh the PATH variable. Verified it with:
wget --version
What is wgetand Why We Need It
wget (pronounced “web-get”) is a command-line tool used to download files or data directly from the internet using HTTP, HTTPS, or FTP.
You can think of it as:
“A downloader for developers like using a browser’s Save As… button, but from your terminal.”
Why It’s Useful for WordPress or PHP Developers
Fast setup: You can grab files, scripts, or archives without opening a browser. wget https://wordpress.org/latest.zip ⮕ Downloads the latest WordPress ZIP instantly into your current folder.
Automation:wget works in setup scripts so you can automatically install or update tools like: wget https://getcomposer.org/installer -O composer-setup.php php composer-setup.php
Headless servers: When you work on servers (e.g. via SSH), there’s no browser but wget lets you fetch what you need.
Training workflows: In software or web companies onboarding, it’s used in scripts that install or update dependencies (Composer, PHPCS, etc.), ensuring everyone has the same setup.
Further readings: https://formulae.brew.sh/formula/wget
4. Git & GitHub CLI
Version control is a key part of any technical or support workflow. Even if we don’t write production-level code daily, knowing Git helps us clone customer sites, test fixes, and push changes when collaborating with development teams.
Installing Git
Start by installing Git for Windows from git-scm.com/download/win. During installation, keep the default settings but make sure to select:
“Git from the command line and also from 3rd-party software.“
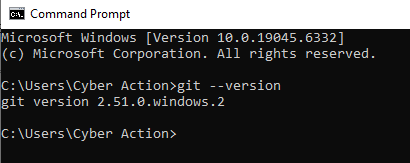
After setup, confirm Git works:
git --version
Expected output:
git version 2.46.0.windows.1
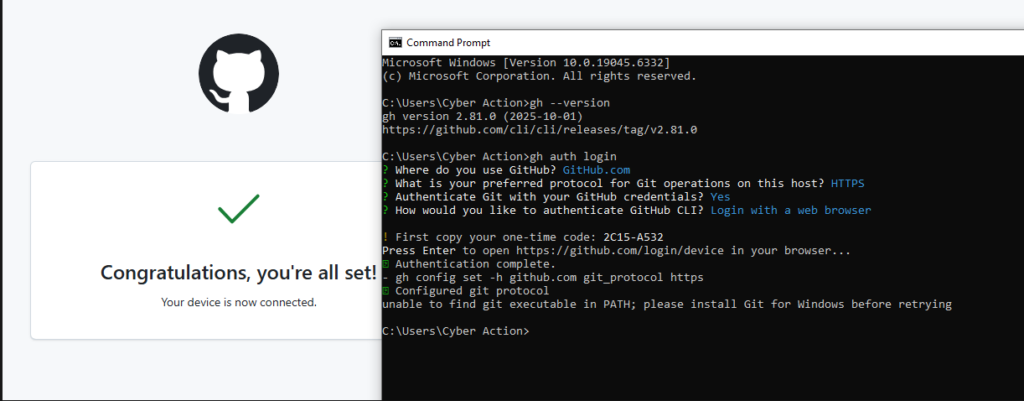
Installing & Linking GitHub CLI
Next, install GitHub CLI from cli.github.com. This command-line tool helps manage repositories, pull requests, and issues directly. Ideal for plugin or theme support workflows.
After installing, verify it:
gh --version
Then run:
gh auth login
Follow the prompts:
Choose GitHub.com
Select HTTPS
Choose Yes for Git authentication
Pick Login with a web browser
Your terminal will show a short code like 2C15-A532 and open a page asking you to confirm the login. Enter that code and authorize access.
You’ll see:
✓ Authentication complete. Logged in as riffaz
However, if you see this message:
unable to find git executable in PATH; please install Git for Windows before retrying
It simply means GitHub CLI detected no Git installation. Just install Git from git-scm.com as shown above, then re-run:
gh auth status
It should now confirm:
✓ Logged in to github.com as riffaz
✓ Git operations for github.com configured to use https protocol.
Why this matters
This combination of Git and GitHub CLI allows technical engineers to:
Clone or fork repositories for debugging.
Reproduce or verify issues reported by customers.
Track commits, branches, and pull requests directly from the terminal.
Together, they form the foundation for collaborative, code-aware technical support.
5. Setting up Local Development Environment
For a WordPress Technical Support Engineer, having a local development environment is essential. It lets you reproduce client issues safely, test fixes before deploying them, and experiment with plugins or code without affecting live sites.
You can set up a local environment using tools like LocalWP, Lando, or wp-env. Since I’m on Windows, I used LocalWP, which is the simplest and most stable option for WordPress development.
Download the Windows version and install with default settings.
No special configuration is needed — just launch the app after installation.
⚙️ Step 2 – Create Your First Test Site
Once installed:
Open LocalWP
Click “Create a New Site”
Name it something like test1 (I used this name for my setup)
Choose Preferred Environment (PHP 8+, MySQL 8+, Nginx or Apache — defaults are fine)
Set up your WordPress admin credentials (for test use, I used admin / admin)
Once setup completes, click “Open Site”
Your new WordPress site should now open at something like: http://test1.local
🧠 Step 3 – Verify Everything Works
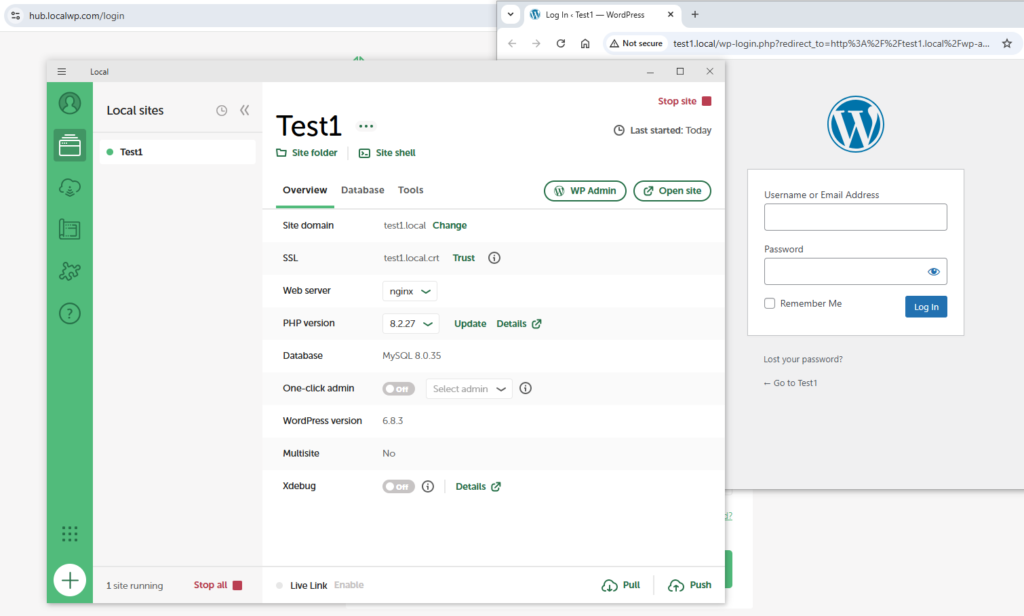
LocalWP automatically installs PHP, MySQL, and WP-CLI.
After creating your site in LocalWP, you’ll see it listed in the left sidebar. Click on your site name (for example, Test1). This opens the site overview screen.
At the top of this screen, right below the site name, you’ll find two links:
Site folder | Site shell
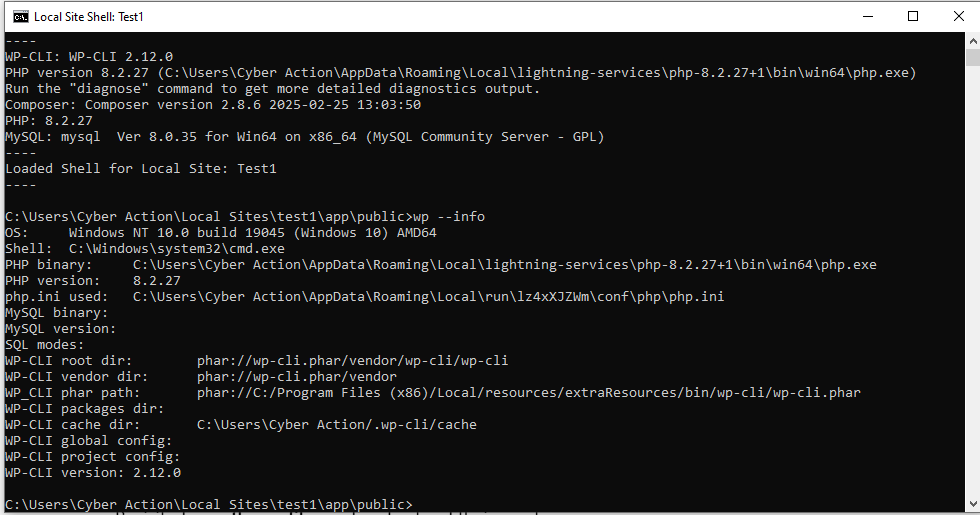
Click “Site shell” — it will open a terminal window (Command Prompt or PowerShell) connected directly to your local WordPress environment.
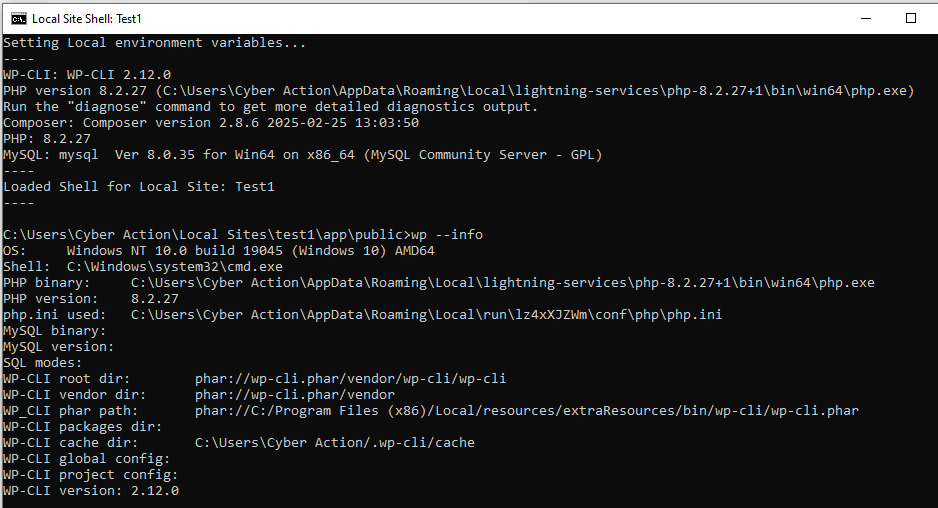
From there, you can run commands like:
wp --info
to confirm WP-CLI is working and properly connected to your site.
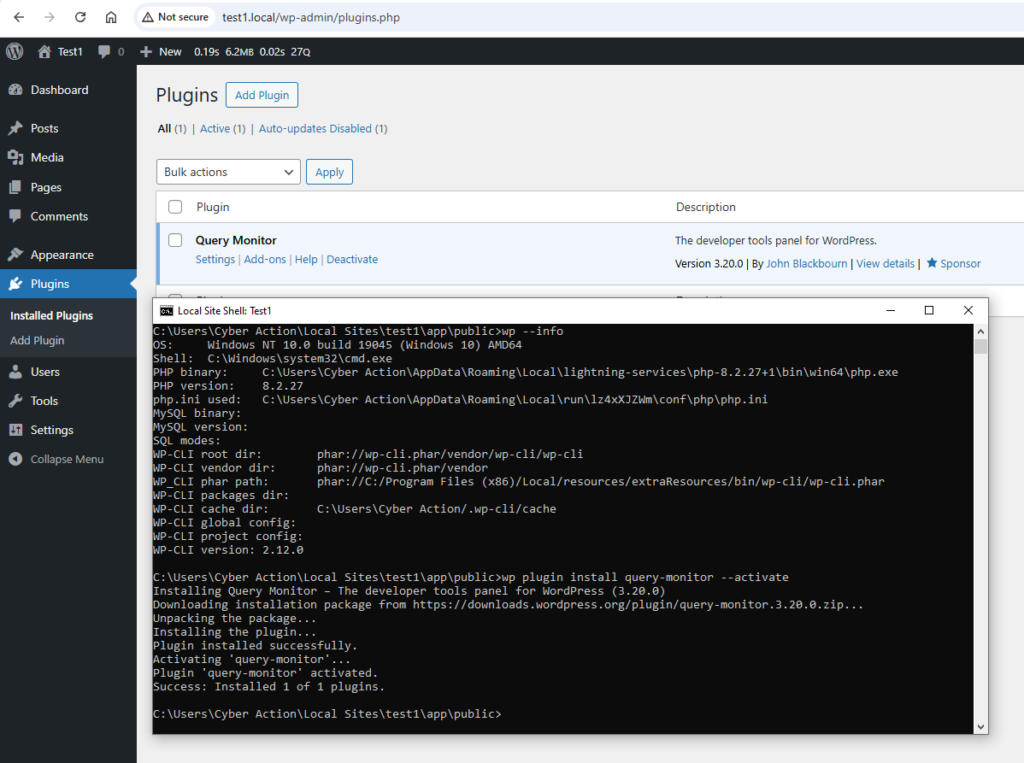
🧩 Step 4 – Optional: Install a Test Plugin
To confirm everything is working smoothly, I installed Query Monitor, a debugging plugin often used in support:
wp plugin install query-monitor --activate
Then I logged into wp-admin and confirmed it appeared under “Plugins.”
Everything worked perfectly on the first run.
What I learned today
Even after years of working with WordPress, I realized how valuable a structured environment setup really is. Following a step-by-step onboarding flow helped me see why each tool matters. Not just how to install it.
NVM keeps Node.js versions isolated for each project.
Composer manages PHP packages cleanly for reproducible setups.
GitHub CLI streamlines repo access and authentication from the terminal.
LocalWP provides a stable, production-like WordPress environment in minutes.
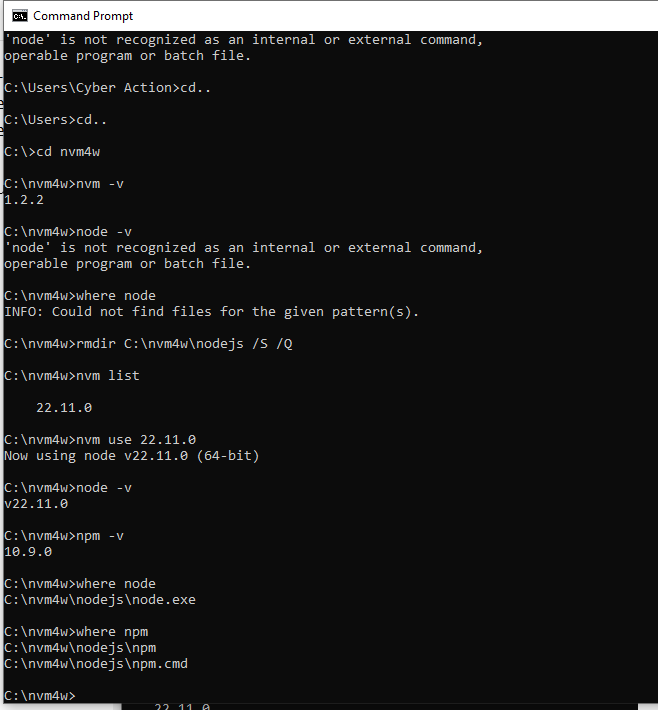
One key takeaway for Windows users: if your username contains spaces, tools like npm may fail. Setting up a clean path or using a short folder name avoids those hidden headaches.
This approach ensures a reliable, scalable workflow for WordPress development and debugging whether you’re building themes, plugins, or managing client sites.
Real-World Onboarding Series (Day 0) by an experienced WordPress technical support engineer
I recently joined a leading WordPress agency that provides structured onboarding for Support Engineers. These posts are inspired by the training steps from that process.
Why this series?
I’ve worked with WordPress for 10+ years as an engineer and support specialist. I’m starting a focused, 14-day series to document how a professional WordPress Technical Support Engineer works from local setup and debugging to coding standards, security, and communication with clients.
It’s a real-world workflow you can follow to prepare for agency work, plugin/theme support roles, or high-quality freelance support.
Who is it for?
Developers moving into technical support
Support engineers who want a clean, repeatable workflow
Agencies onboarding new team members
Freelancers who handle WooCommerce / plugin conflicts and performance issues
What you’ll learn (14-day roadmap)
Day 1 – Setting up a reliable local environment and using debugging tools (WP-CLI, Query Monitor, logs) Day 2 –WPCS & PHPCS: clean, review-ready code Day 3 –Security basics: sanitizing, escaping, nonces, safe queries Day 4 –WordPress Core overview: hooks, filters, plugin/theme loading order Day 5 –WP_Query & request lifecycle: tracing issues the right way Day 6 –Gutenberg & FSE: block troubleshooting, patterns, theme.json basics Day 7 – Gutenberg deep-dive: common editor bugs & fixes Day 8 –WordPress.com vs self-hosted: hosting realities, staging, backups Day 9 – Performance mindset: caching, images, asset loading, Core Web Vitals Day 10 – Top 10 support cases & how to triage fast (plugins, themes, PHP versions) Day 11 – Communication & tickets: reproducible steps, summaries, hand-offs Day 12 – Week 1 recap: what to keep, what to automate Day 13 – Week 2 recap: block editor, performance, workflows Day 14 – Final checklist & resources to keep improving
How to use this series
Read a day, apply it on a test site, and keep short notes.
Save commands and snippets into your own knowledge base.
Share with teammates, this doubles as a mini onboarding guide.
What you’ll need
A local WordPress install (Local, DevKinsta, or similar)
Basic Git knowledge (optional)
A text editor (I use Notepad++ )
Access to a staging site (optional but helpful)
My promise
I’ll keep each day short, practical, and written in simple English. You’ll get clear steps, tools, and checklists that you can reuse in real client work.
Next post:Day 1 – Setting Up a WordPress Support Environment & Debugging Like a Pro.
What I learned today
Even with years of experience handling WordPress support, Day 0 reminded me of the value of a structured onboarding process.
It helped me see the bigger picture about how having a defined learning path, clear expectations, and a step-by-step plan builds consistency across a support team and communication can provide references and resources to make support faster, more reliable, and easier to scale in a team setting.
Laying this foundation before jumping into technical setup ensures that everyone speaks the same language, follows the same standards, and can scale their workflow efficiently later on.
I am currently looking for a full-time remote job. In the meantime, I am also available for any freelancing work within my expertise, which you can find in my contact form
** If you are considering employing me for a traditional office job, I would be open to it if offered a fair salary and if the job is located in a country I prefer.