Today’s training was a big shift from pure development topics. We stepped into the WordPress.com ecosystem, which is completely different from self-hosted WordPress.org sites. For anyone aiming to be a WordPress Support Engineer, this is a must-know area because so many users mix the two up.
Understanding WordPress.com vs WordPress.org
This is probably one of the most common confusions users have. WordPress.com is a managed hosting platform built by Automattic where WordPress runs on their servers. WordPress.org is open-source software that anyone can install on their own hosting.
When users ask things like “Why can’t I install plugins on my Premium plan?”, the answer often lies here, only the Business plan and above on WordPress.com support plugin installations.
A fresh and exciting feature Jetpack AI Builder is now integrated into WordPress.com. It helps users instantly create a professional-looking website or even generate a custom logo with AI assistance.
I took a look at the guides below, and it’s surprisingly beginner-friendly. It asks a few questions about the site’s purpose and then builds a base layout with relevant pages. As a support engineer, the goal isn’t just to use it but to help users understand what it can and can’t do, especially those expecting “AI magic” to replace real customization.
This part helped me understand how domains work inside WordPress.com — registering, connecting, transferring, and even renewing. The platform gives a free domain for one year when someone buys an annual plan, which users often forget to renew later.
Common scenarios in tickets:
“Why is my site still showing wordpress.com in the address?”
“Can I use my GoDaddy domain here?”
“My domain expired, what can I do?”
Each of these has a specific guide, and it’s crucial to point users to the right solution instead of explaining everything manually.
Every support engineer eventually deals with plan upgrades, renewals, and refunds. Learning these processes helps us guide users confidently without escalating unnecessarily.
Email Setup (Google Workspace & Professional Email)
I also explored how users can connect Professional Email or Google Workspace to their WordPress.com domain. This is an area where many users expect it to “just work automatically,” so understanding how to walk them through the DNS and MX record setup is key.
Finally, there’s a massive collection of guides under Troubleshooting Category I bookmarked this one since it’s basically a goldmine for any future support situation – login errors, editor issues, or domain propagation delays.
What I learned Today
This day really connected the dots between product knowledge and customer empathy. It’s not just about knowing where to click. It’s about understanding what a user is actually trying to achieve and pointing them to the right guide instead of overwhelming them.
From the AI builder to payment handling, this was a day that truly felt like stepping into the customer’s shoes.
Today’s training focused on some of the most important developer-level areas of WordPress:
How a theme is structured internally
How themes behave in Multisite environments
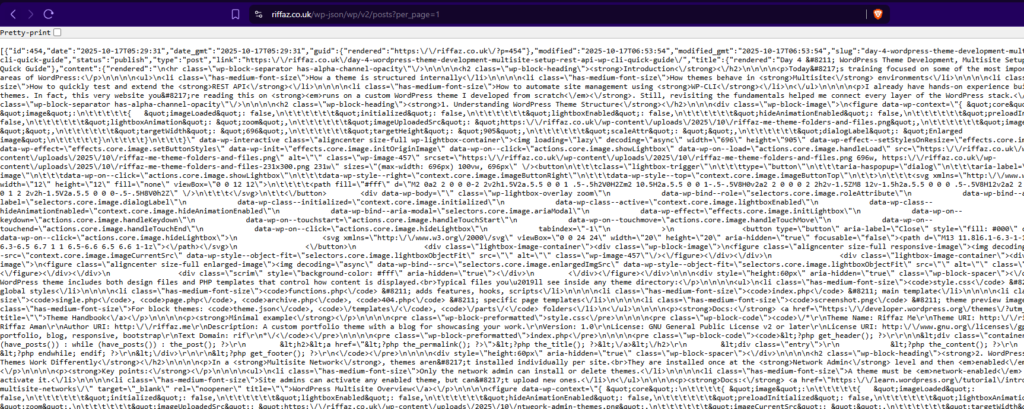
How to quickly test and extend the REST API
How to automate site management using WP-CLI
I already have hands-on experience building custom WordPress themes. In fact, this very website you’re reading this on runs on a custom WordPress theme I developed from scratch. Still, revisiting the fundamentals helped me connect every layer of the WordPress stack.
1. Understanding WordPress Theme Structure
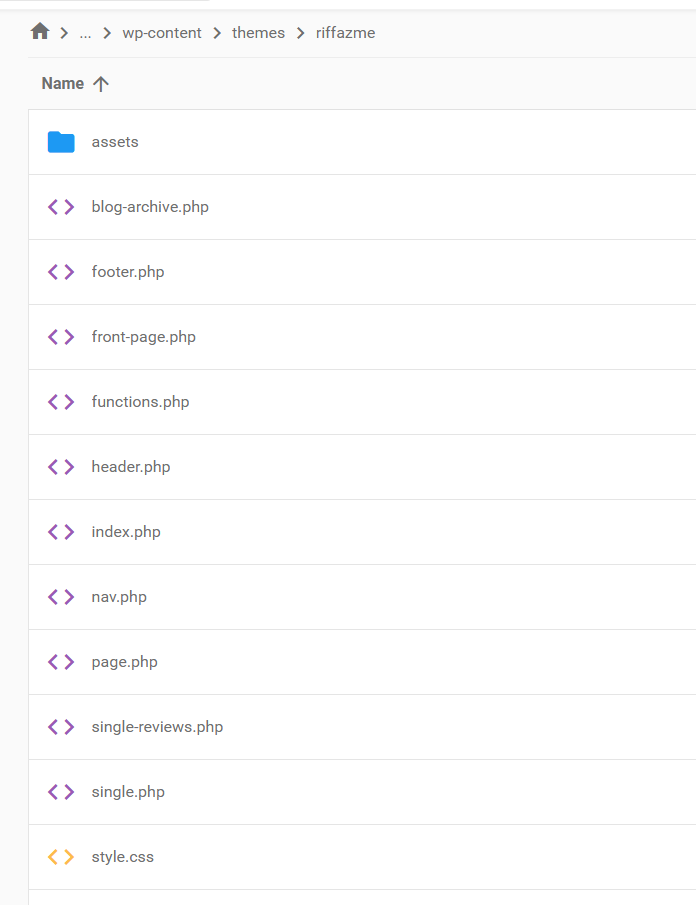
A WordPress theme includes both design files and PHP templates that control how content is displayed. Typical files you’ll see inside any theme directory:
style.css – theme info & global styles
functions.php – adds features, hooks, scripts
index.php – main template
single.php, page.php, archive.php, 404.php – specific page templates
screenshot.png – theme preview image
For block themes: theme.json, /templates/, /parts/ folders
/*
Theme Name: Riffaz Me
Theme URI: http://riffaz.me
Author: Riffaz Aman
Author URI: http://riffaz.me
Description: A custom portfolio theme with a blog for showcasing your work.
Version: 1.0
License: GNU General Public License v2 or later
License URI: http://www.gnu.org/licenses/gpl-2.0.html
Tags: portfolio, blog, responsive, bootstrap
Text Domain: rif
*/
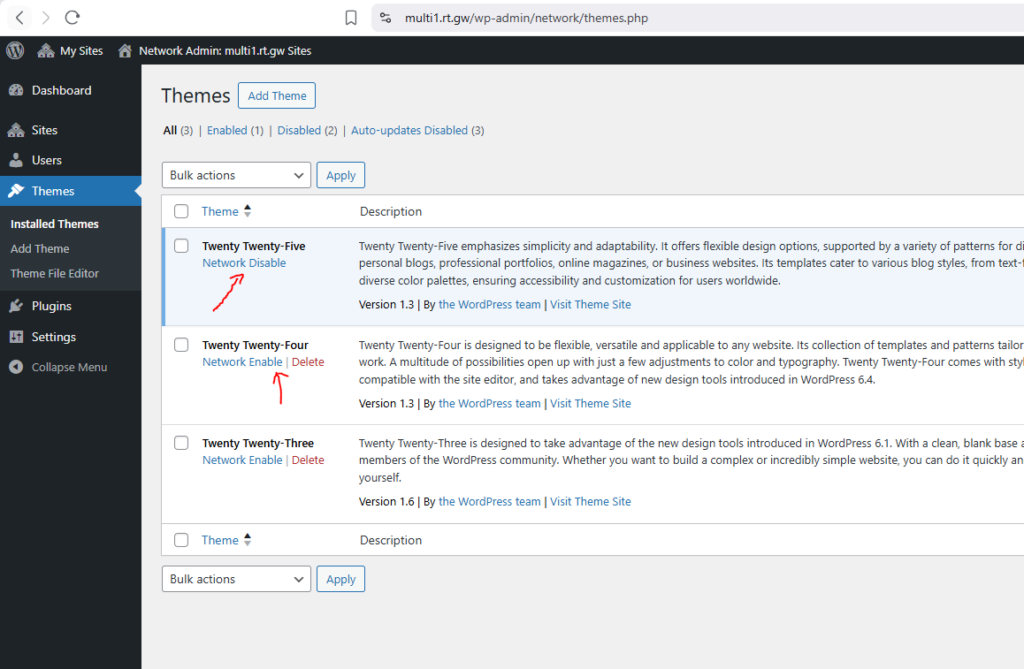
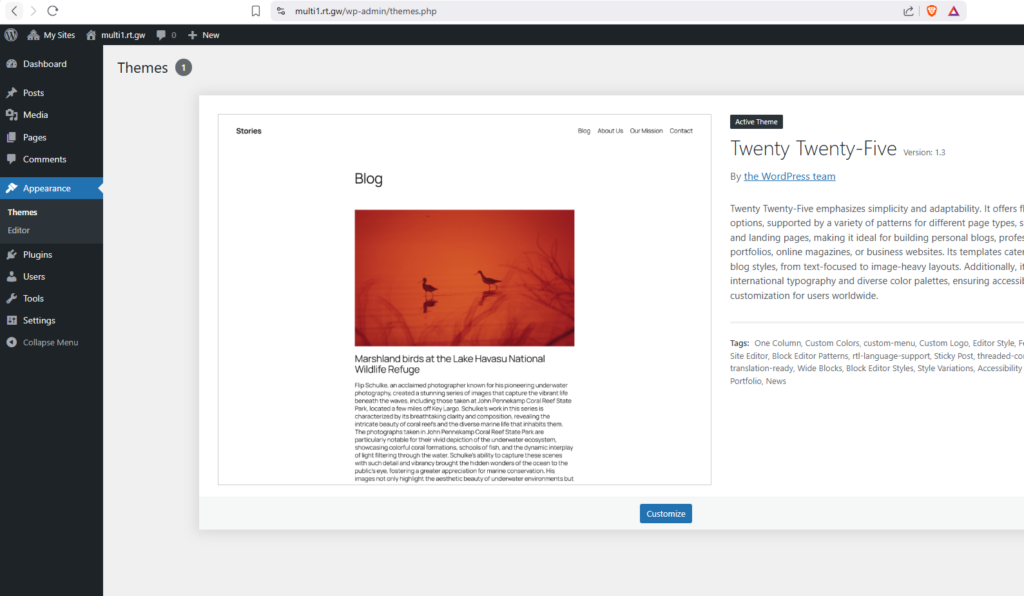
2. WordPress Multisite – How Themes Work Differently
In a Multisite Network, themes aren’t installed individually per site. They are installed once at the Network Admin level and then enabled for each site.
Key points:
Only the network admin can install or delete themes.
A theme must be network-enabled before sites can activate it.
Site admins can activate any enabled theme, but can’t upload new ones.
In a Multisite network, themes are centrally managed install once, enable globally, then activate per site.
2.1 Creating and Using a Child Theme
A Child Theme is a lightweight theme that inherits all templates and functionality from another theme, known as the Parent Theme. It lets you customize or extend your site without touching the parent’s code, so your changes remain safe when the parent theme updates.
When to Use a Child Theme
You’re customizing a downloaded or premium theme
You want to override specific templates or styles
You plan to add functions or modify layouts without editing the main theme files
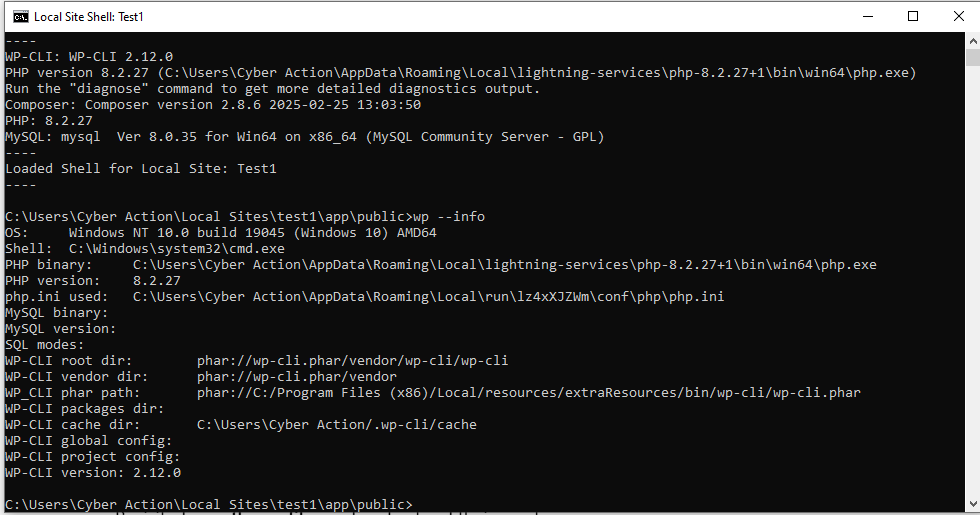
WP-CLI allows developers to manage WordPress installations directly from the command line, perfect for automation, debugging, and deployments.
Essential commands to try
wp --info
wp core version
wp plugin list
wp theme list
wp cache flush
wp user list
wp post list --post_type=page --fields=ID,post_title,post_status --format=table
Docs:WP-CLI Command List
What I Learned Today
I revisited the core theme files and finally understood how each one works together to form a complete WordPress theme. Seeing my own theme structure (riffazme) made it easier to relate theory to something I’ve actually built.
Then I explored how Multisite handles theme installation and activation. I never fully appreciated before how themes are managed at the network level and shared across multiple sites. A simple but powerful concept.
I also experimented with the REST API, fetching real post data and even registering a quick custom route. It’s amazing how a few lines of code can expose your entire WordPress data to external apps.
Next, I tried out WP-CLI the command-line tool that gives instant admin-level control. Listing plugins, flushing cache, and even adding custom commands felt both fun and efficient.
And to top it off, I realized this very website you’re reading is the best proof of my theme development experience. It runs entirely on my own custom theme.
Day 4 wrapped up with some of the most essential developer skills every WordPress engineer should master. From theme architecture to REST API and WP-CLI, these tools are the real foundation of professional WordPress development and exactly what I’ll be applying daily at any WordPress agency/company or beyond.
Today’s focus was on debugging WordPress effectively and understanding the core parts of WordPress development that every support engineer must know.
I began by learning how to turn on debugging safely using constants in wp-config.php, and then explored three powerful helper plugins, Query Monitor, WP Crontrol, and User Switching to track performance issues, manage cron events, and reproduce user-specific bugs.
After mastering debugging, I moved into core WordPress development:
creating a small plugin,
basic concept of creating plugins
custom post types
custom taxonomies
wp_query
This day tied everything together showing how WordPress works under the hood, and how to quickly troubleshoot, extend, and optimize any site with professional-level tools.
01. Defining Debugging Constants in WordPress
When working as a support engineer or developer, debugging is your best friend — but it should always be enabled safely. WordPress allows you to control what errors appear and where they’re stored using a few simple constants inside wp-config.php.
Add the following lines above the comment /* That's all, stop editing! Happy publishing. */:
define( 'WP_DISABLE_FATAL_ERROR_HANDLER', true ); // WP 5.2 +: show real fatal errors while developing

define( 'WP_DEBUG', true ); // turn on WordPress debug mode

define( 'WP_DEBUG_DISPLAY', false ); // hide errors from the browser

define( 'WP_DEBUG_LOG', true ); // log all errors to /wp-content/debug.log

define( 'SCRIPT_DEBUG', true ); // load unminified core CSS and JS files
What Each Constant Does
Constant
Purpose
WP_DISABLE_FATAL_ERROR_HANDLER
Disables WordPress’ built-in “white screen protection,” so you can view actual fatal errors while developing. (Only use this on local or staging environments.)
WP_DEBUG
Enables all PHP notices, warnings, and errors for WordPress and plugins.
WP_DEBUG_DISPLAY
Hides errors from the frontend or admin area to avoid breaking layouts.
WP_DEBUG_LOG
Saves all errors to /wp-content/debug.log, which can be opened in any text editor.
SCRIPT_DEBUG
Forces WordPress to use non-minified core files, making it easier to trace JS and CSS issues.
Where to View the Log
Open the file: example.com/wp-content/debug.log
You can also use a plugin such as Log Viewer or Error Log Monitor to read this log directly from the dashboard.
⚠️ Safety Notes
These settings are for development only.
On live sites, set WP_DEBUG and SCRIPT_DEBUG to false, and remove the fatal-error-handler line.
Clear or rotate the debug.log regularly to prevent it from growing too large.
Combine this setup with plugins like Query Monitor or WP Crontrol for a complete debugging workflow.
02. Helper Plugins for Debugging in WordPress
There are certain WordPress plugins that make it much easier to debug PHP errors, actions, filters, enqueued scripts and stylesheets, and even HTTP requests. In this section, we’ll go over three essential ones Query Monitor, WP Crontrol, and User Switching and see how each helps during development and troubleshooting.
Checked for slow database queries and heavy hooks on page load.
WP Crontrol
Lets you view and manage cron events and scheduled tasks.
Disabled duplicate or unnecessary cron jobs during testing.
User Switching
Quickly switch between users without logging out/in.
Reproduced role-specific bugs (Subscriber vs Admin) safely.
Query Monitor
Query Monitor adds a complete developer tools panel inside WordPress. It lets you inspect almost everything happening behind the scenes:
Database queries (with execution time and source)
PHP errors and notices
Hooks and actions currently running
Enqueued scripts and styles
REST API and Ajax calls
HTTP API requests and responses
Block Editor blocks and capability checks
The plugin automatically adds a toolbar entry in the WordPress admin bar; click it to open detailed tabs for each section.
Why it’s useful Query Monitor instantly shows slow database queries or heavy hooks, helping identify performance bottlenecks. It’s a must-have in every development or staging site.
Here’s a brief introduction about the plugin and what information it displays and where:
Anything consistently over 0.05 seconds per query or memory use above 64 MB on simple pages is worth optimizing.
Example
“If a plugin is making 40 duplicate queries per page. Disabling it cut load time from 2.5 s to 1.3 s.”
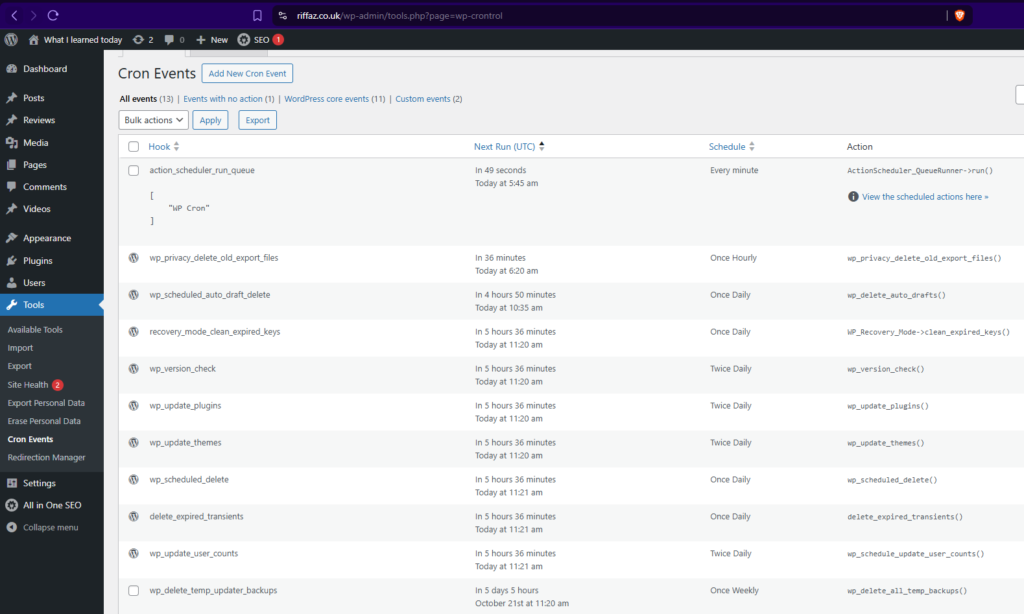
WP Crontrol
WP Crontrol allows you to view, manage, and debug WordPress Cron events directly from the admin area. From its interface you can:
View all cron events with their hooks, arguments, recurrence, and next-run time
Edit, delete, or immediately run any event
Add custom cron events or custom schedules
Bulk-delete unwanted events
Export cron events to a CSV file
Why it‘s useful This plugin helps verify whether scheduled tasks (like emails, imports, or backups) are running properly. A common cause of “nothing happens” issues in WordPress.
You can read more about WP Crontrol on its plugin page.
User Switching
User Switching lets you instantly swap between user accounts without logging out and back in. Normally, testing as a specific user means resetting passwords and logging in manually; this plugin saves all that time.
Helpful when:
An issue appears only for specific users or roles (e.g., “Subscriber can’t see button”)
You need to test restricted content, membership, or checkout flows for different roles
Just click Switch To under any user in Users → All Users, and you’ll be logged in as them instantly. A single click restores your original admin session.
After completing the debugging and helper plugins session, I took a short lunch break. Once back, I moved on to the Basic Plugin Development module starting with how plugins are structured, how to register them properly, and how WordPress hooks (actions and filters) connect everything behind the scenes.
03. Basic Plugin Development – Quick Start
Before diving into the deeper APIs, I focused today on understanding how plugins are structured and how hooks connect everything inside WordPress.
I began with a quick hands-on experiment using an MU-plugin to understand how WordPress executes hooks, and then gradually explored how actions and filters form the core of every plugin.
Understanding Hooks with an MU-Plugin
Before building a regular plugin, I tested how WordPress triggers hooks internally by creating a small MU-plugin (Must-Use Plugin). MU-plugins load automatically on every request, making them perfect for experiments and debugging.
Steps followed:
Created a new folder: wp-content/mu-plugins/
Added a file: wp-content/mu-plugins/hook-watcher.php
hook-watcher.php
<?php
/**
* Plugin Name: Hook Watcher (MU)
* Description: Logs every hook that fires — for learning purposes only.
*/

if ( ! defined( 'ABSPATH' ) ) exit;

// Extremely noisy — use only on local environment
add_action( 'all', function ( $hook ) {
 error_log( $hook ); }
);
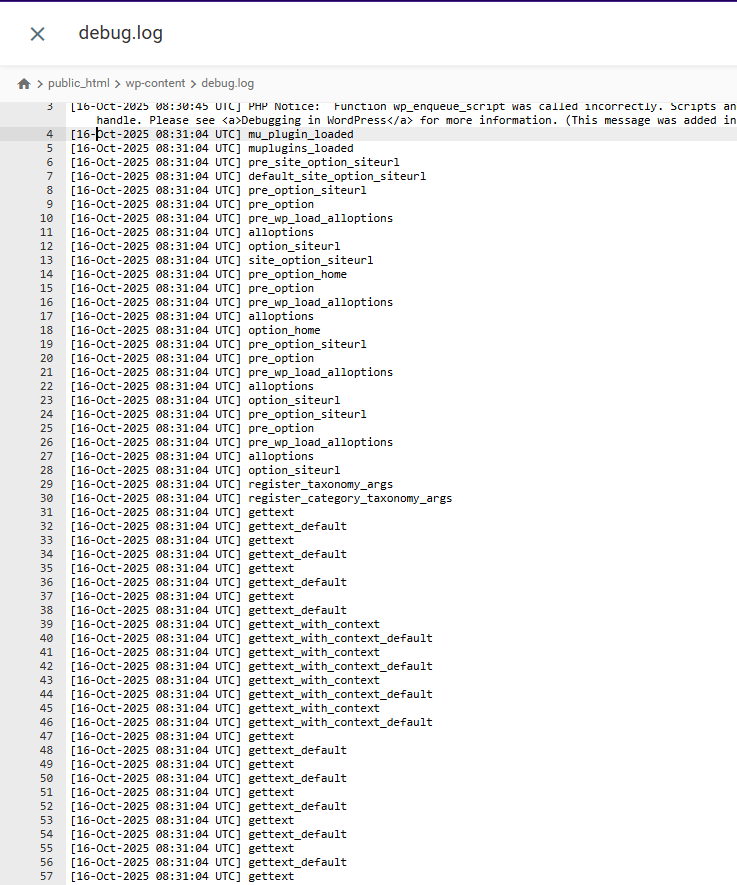
With WP_DEBUG_LOG enabled, this script records every WordPress hook into /wp-content/debug.log.
What I Observed
Opening the log showed a long list of hook names like:
🧩 3. Hooks – Actions and Filters
Hooks are the backbone of WordPress extensibility. They allow plugins, themes, and even core to “talk” to each other.
Effect: This replaces every rendered block on the site with a random image from Picsum. It clearly shows how a filter can intercept and modify the final output before display. (And yes, remove this after testing 😄)
💡 Ideas to Explore
1️⃣ What is the purpose of add_action() and how is it implemented? add_action() attaches your custom function to a hook so it runs at a specific moment.
Use priority to control the order when multiple functions are attached to the same hook.
✅ Summary
MU-plugins are great for quick experiments and debugging.
add_action() runs your code at a specific point.
add_filter() modifies data before it appears.
do_action() and apply_filters() are what actually fire those hooks.
Priority lets you decide the order of execution.
Together, these form the core foundation of how every WordPress plugin works.
04. Custom Post Types and Taxonomies – Quick Run
With limited time left in the day, I did a short but practical run on Custom Post Types (CPTs) and Custom Taxonomies. Two features that make WordPress flexible beyond posts and pages.
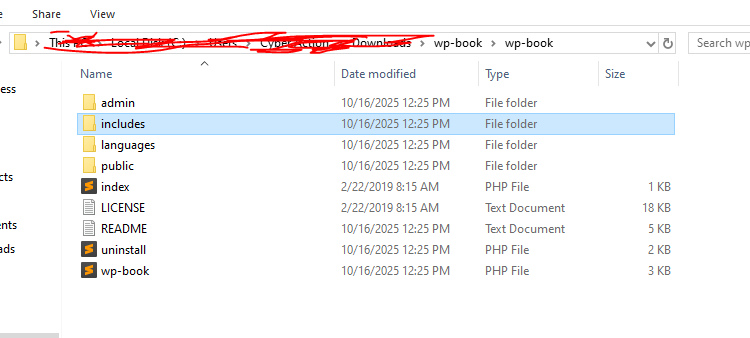
1. Custom Post Types
A Custom Post Type lets you create new types of content. For example, Books, Projects, or Reviews, each with its own editor and structure.
You register a CPT using the register_post_type() function, usually inside a plugin or in functions.php.
Defines all text displayed in the admin for this CPT (name, add new, edit, etc.).
public
Makes it visible on the frontend and admin menu.
has_archive
Creates an archive page like /books/.
rewrite
Defines custom URL slug for the CPT.
supports
Enables features like title, editor, thumbnail, etc.
show_in_rest
Enables block editor and REST API support.
menu_icon
Sets a custom icon in the dashboard menu.
👉 In short:labels control the text users see; args control how the post type behaves.
2. Custom Taxonomies
A taxonomy groups related posts together. For example, genres for books or skills for projects. WordPress includes two default taxonomies: Categories and Tags, but you can create your own.
Custom Taxonomies group content within those post types.
Use them when default categories/tags don’t fit your structure.
05. WP_Query – Custom Queries in WordPress
I also did a quick review of WP_Query, the main class that controls how WordPress retrieves posts from the database.
What is WP_Query?
WP_Query is the core query class that WordPress uses to fetch posts, pages, or custom post types based on specific conditions — for example, only posts from a certain category, author, or date range.
It gives developers complete control over which posts are displayed and in what order.
Today everything started to click. I began the morning by setting up proper debug constants in wp-config.php, and for the first time, errors were neatly written to debug.log instead of cluttering the screen.
Then came my first MU-plugin, a little “hook watcher” that logged every WordPress hook. Watching hundreds of hooks fire in sequence was fascinating and made me realise how many moving parts build a single page. (I quickly deleted it before the log exploded 😄.)
I also tried a few helper plugins: Query Monitor for tracking slow queries, WP Crontrol for checking cron jobs, and User Switching to test different roles, all simple but powerful tools for real-world debugging.
After lunch, I experimented with actions and filters. That’s when things really made sense, actions let me do something, while filters let me change something. I even tried the render_block filter trick that replaced all blocks with random images funny, but eye-opening.
Some of these things I already knew. I learned a lot of this when I built my own plugin Clean Checkout for WooCommerce. But this time, the structured approach in the training helped me connect all those pieces together and understand why things work the way they do.
To end the day, I quickly created a Custom Post Type (“Books”) with a Genre taxonomy, then explored WP_Query and how it differs from get_posts() and query_posts(). Now I finally understand how WordPress fetches, organizes, and displays content not just how to fix it.
Tomorrow’s plan: dive into Theme Development and the REST API basics to tie everything together.
As part of my WordPress Technical Support Engineer Training, after completing the environment setup on Day 1, today’s focus was to install and configure a full-fledged Integrated Development Environment (IDE) using Visual Studio Code, set up Z Shell (Oh My Zsh) for a faster command-line workflow, and explore the basics of Git and SVN.
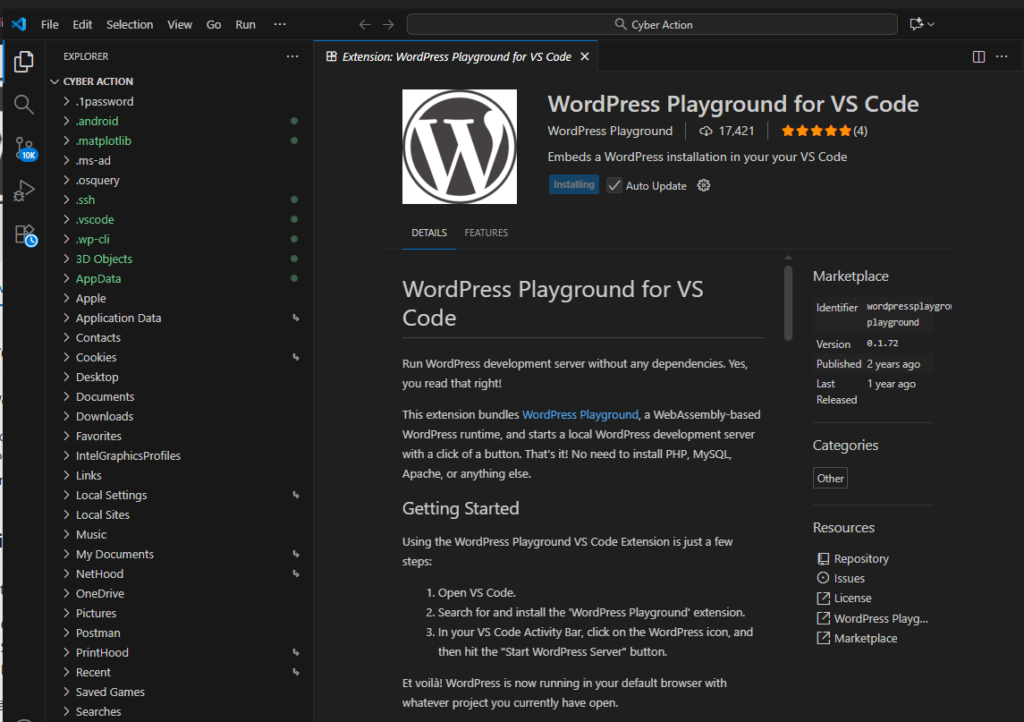
2️⃣ Installed essential extensions for WordPress development: https://marketplace.visualstudio.com/items?itemName=WordPressPlayground.wordpress-playground
WordPress Playground (launch WordPress instantly inside VS Code)
We can install the following extensions too if we need:
PHP Intelephense
Prettier – Code Formatter
GitLens – Git super-charged
ESLint
Markdown All in One
Live Server
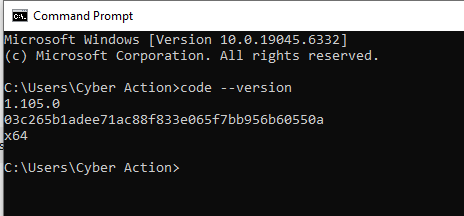
3️⃣ Verified installation via terminal:
code --version
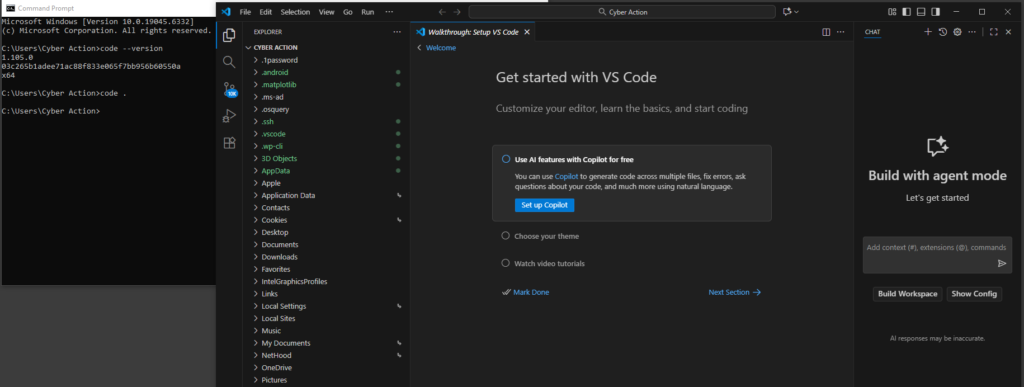
4️⃣ Opened the local project folder directly in VS Code:
code .
2. Using WordPress Playground Extension
The WordPress Playground extension lets you spin up a full WordPress site inside VS Code without installing PHP or MySQL.
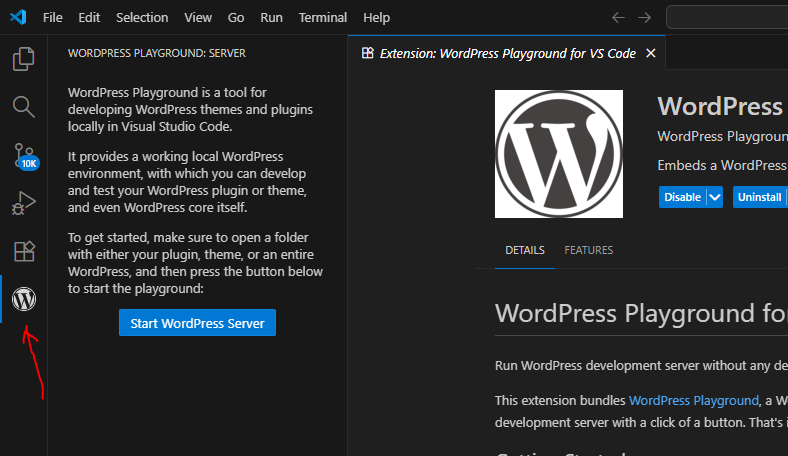
Steps:
1️⃣ Open VS Code → Extensions → Search WordPress Playground → Install. 2️⃣ Click the WordPress icon in the Activity Bar. 3️⃣ Select Start WordPress Server. 4️⃣ It opens your project in a browser with a live WP environment. This is perfect for quick plugin or theme testing.
” If the extension doesn’t start on Windows, keep LocalWP as a fallback that we created in day 1.
3. Setting Up Z Shell (Zsh) and Oh My Zsh
To improve terminal speed and readability, I installed Zsh and configured Oh My Zsh for plugins and themes.
Installation commands:
sudo apt install zsh -y chsh -s $(which zsh)
Install Oh My Zsh:
sh -c "$(curl -fsSL https://raw.githubusercontent.com/ohmyzsh/ohmyzsh/master/tools/install.sh)"
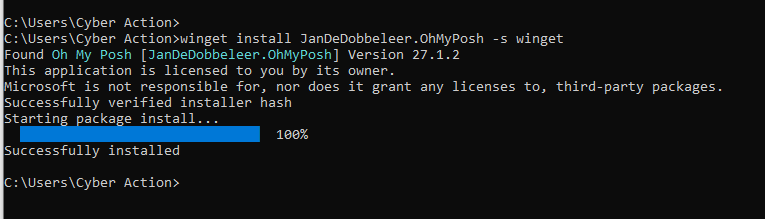
For windows:
Zsh is does not natively support Windows. Instead, we can try Oh My Posh.
In short:
🧩 Zsh & Oh My Zsh → Need Linux/macOS or WSL.
⚙️ Oh My Posh → Windows-friendly equivalent with similar benefits.
winget install JanDeDobbeleer.OhMyPosh -s winget
Recommended plugins (I did not try these but good if you want to explore a bit):
git
z
autojump
zsh-autosuggestions
zsh-syntax-highlighting
Feature / Aspect
Zsh (Z Shell)
Oh My Zsh
Type
Command-line shell (replacement for Bash)
Framework / configuration manager for Zsh
Purpose
Provides an enhanced shell environment
Simplifies managing Zsh configuration, themes, and plugins
Installation
Installed as a standalone shell using package manager (sudo apt install zsh)
Installed after Zsh via a curl or wget script
Default Features
Basic improvements over Bash: better tab completion, spelling correction, globbing
Ships with 100+ themes and 200+ plugins pre-configured
Configuration File
Uses ~/.zshrc (manual editing needed)
Also uses ~/.zshrc, but auto-populated with friendly defaults
Managed via simple edits — enable/disable plugins and themes easily
Themes
None by default (plain prompt)
Comes with many built-in themes like robbyrussell, agnoster, powerlevel10k
Plugins
Must install and configure manually
Includes plugin system — just add names in plugins=(git z ...)
Ease of Use
Requires manual setup and knowledge of config syntax
Ready-to-use immediately after install; beginner-friendly
Performance
Slightly faster since it loads fewer scripts
Slightly slower at startup because of extra plugins and themes
Best For
Power users who want full control
Developers who want a quick, beautiful, and feature-rich shell
Example Installation
sudo apt install zsh
sh -c "$(curl -fsSL https://raw.githubusercontent.com/ohmyzsh/ohmyzsh/master/tools/install.sh)"
Zsh vs Oh My Zsh
4. Introduction to Git and SVN
I explored how Git and SVN work, focusing on core commands. I already covered Git and Git CLI installation yesterday here
Git basics:
git init
git clone <repo-url>
git add .
git commit -m "Initial commit"
git branch feature
git checkout feature
git merge feature
git push origin main
SVN overview: SVN is centralized version control, while Git is distributed. Understanding this helps when working with older WordPress plugin repositories that still use SVN for releases.
🧭 Course Relevance Note
While exploring today’s and yesterday’s topics, I realized that some sections such as NVM, Composer,Zsh setup and the Git commands and Git quiz are more developer-oriented than necessary for a WordPress Technical Support Engineer.
These parts are useful for developers who:
Commit code regularly
Work inside CI/CD or staging environments
Handle pull requests or deployments
However, since a support engineer’s main focus is troubleshooting, debugging, and communication, (sometimes providing small qucik PHP snippets) these topics are not essential for daily work. So, I decided to skip those for now and continue focusing on the areas that directly strengthen technical support skills.
📘 Additional Module
After wrapping up the main tasks of Day 2, I also completed the Web Basics module, which covered:
Domain Name System (DNS)
HTTP / HTTPS
How the Web Works
Browser and Rendering Engines
Web Servers
Emails
Since I already knew many of these from past experience, it served as a quick refresher and took about an hour.
For readers unfamiliar with these topics, you can simply google these topics.
📮 Note for WordPress devs and testers: You can use MailPit locally to capture outgoing emails (contact form notifications, WP emails) without sending them externally. It’s a safe and practical tool for testing.
💡 What I Learned Today
A proper IDE setup makes daily WordPress work smoother and saves a lot of time.
WordPress Playground can instantly launch a test site inside VS Code without any server configuration. This is ideal for quick plugin or theme checks.
Zsh / Oh My Zsh are optional for support engineers; helpful for command-line comfort but not mandatory.
Git knowledge is useful but not essential for roles that don’t touch codebases or deployments.
The key takeaway is to focus learning on debugging, troubleshooting, and communication, rather than deep developer workflows.
Real-World Onboarding Series (Day 0) by an experienced WordPress technical support engineer
I recently joined a leading WordPress agency that provides structured onboarding for Support Engineers. These posts are inspired by the training steps from that process.
Why this series?
I’ve worked with WordPress for 10+ years as an engineer and support specialist. I’m starting a focused, 14-day series to document how a professional WordPress Technical Support Engineer works from local setup and debugging to coding standards, security, and communication with clients.
It’s a real-world workflow you can follow to prepare for agency work, plugin/theme support roles, or high-quality freelance support.
Who is it for?
Developers moving into technical support
Support engineers who want a clean, repeatable workflow
Agencies onboarding new team members
Freelancers who handle WooCommerce / plugin conflicts and performance issues
What you’ll learn (14-day roadmap)
Day 1 – Setting up a reliable local environment and using debugging tools (WP-CLI, Query Monitor, logs) Day 2 –WPCS & PHPCS: clean, review-ready code Day 3 –Security basics: sanitizing, escaping, nonces, safe queries Day 4 –WordPress Core overview: hooks, filters, plugin/theme loading order Day 5 –WP_Query & request lifecycle: tracing issues the right way Day 6 –Gutenberg & FSE: block troubleshooting, patterns, theme.json basics Day 7 – Gutenberg deep-dive: common editor bugs & fixes Day 8 –WordPress.com vs self-hosted: hosting realities, staging, backups Day 9 – Performance mindset: caching, images, asset loading, Core Web Vitals Day 10 – Top 10 support cases & how to triage fast (plugins, themes, PHP versions) Day 11 – Communication & tickets: reproducible steps, summaries, hand-offs Day 12 – Week 1 recap: what to keep, what to automate Day 13 – Week 2 recap: block editor, performance, workflows Day 14 – Final checklist & resources to keep improving
How to use this series
Read a day, apply it on a test site, and keep short notes.
Save commands and snippets into your own knowledge base.
Share with teammates, this doubles as a mini onboarding guide.
What you’ll need
A local WordPress install (Local, DevKinsta, or similar)
Basic Git knowledge (optional)
A text editor (I use Notepad++ )
Access to a staging site (optional but helpful)
My promise
I’ll keep each day short, practical, and written in simple English. You’ll get clear steps, tools, and checklists that you can reuse in real client work.
Next post:Day 1 – Setting Up a WordPress Support Environment & Debugging Like a Pro.
What I learned today
Even with years of experience handling WordPress support, Day 0 reminded me of the value of a structured onboarding process.
It helped me see the bigger picture about how having a defined learning path, clear expectations, and a step-by-step plan builds consistency across a support team and communication can provide references and resources to make support faster, more reliable, and easier to scale in a team setting.
Laying this foundation before jumping into technical setup ensures that everyone speaks the same language, follows the same standards, and can scale their workflow efficiently later on.
A VPS, or Virtual Private Server, is like having a condo in a building. Even though you share the building with others, you have your own space that you can decorate and use however you like. Similarly, a VPS shares a physical computer with other VPSs, but you get your own portion of that computer that no one else can touch. This gives you more control and room to do things compared to sharing a space, like in shared hosting, which is more like living in a crowded dorm room.
Typically, this does not come with a control panel like cPanel. You will have to install and set up everything from scratch, including control panels like cPanel or CyberPanel.
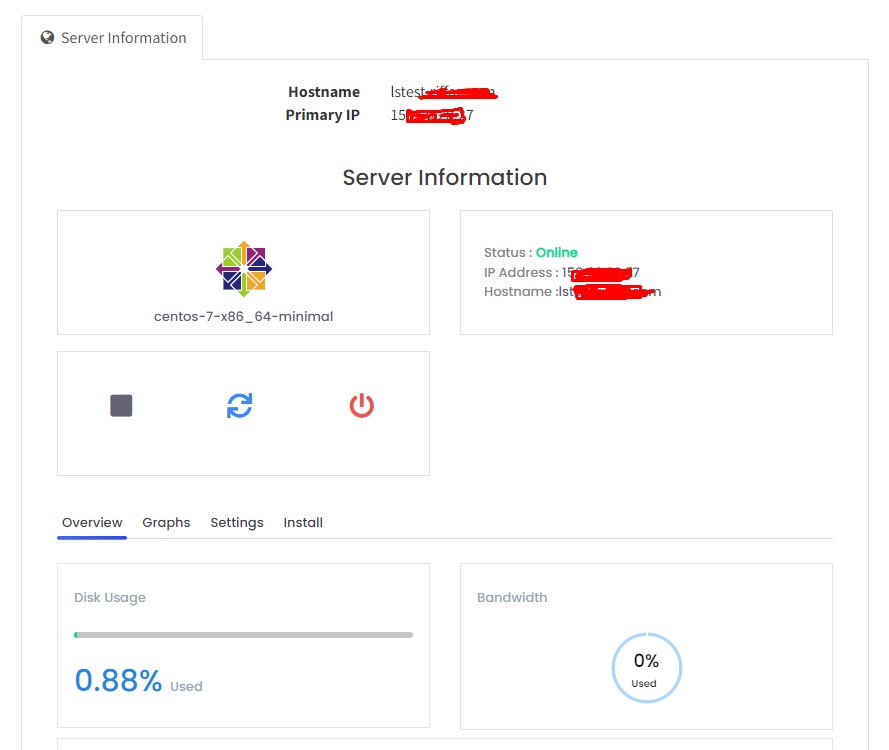
Most VPS providers offer CentOS as the default operating system installed on their servers. When you receive your VPS, it will already be running CentOS within a Linux environment. This setup is where you’ll need to install applications like CyberPanel.
This is a fresh VPS account with CentOS installed
What is a CyberPanel?
CyberPanel is a web hosting control panel, much like a dashboard that helps you manage websites on your server easily, without needing to use complex command lines. Think of it as a remote control for your TV, but instead of controlling a TV, it controls your server.
With CyberPanel, you can create and manage websites, set up and manage email accounts, handle domains, secure your websites with free SSL certificates, and more, all through a simple, user-friendly interface. This makes it an excellent tool for people who aren’t very technical but need to manage web hosting or servers.
If you look at the screenshot in the previous section, you can see there is no control panel to manage or create websites. Therefore, we will need to install CyberPanel.
Why CyberPanel? Not cPanel?
Choosing between CyberPanel and cPanel for managing a VPS can be compared to choosing between different types of remote controls based on what features they offer and how easy they are to use. Here’s a simplified explanation focusing on CyberPanel, especially considering its compatibility with LiteSpeed, Linux, and VPS:
CyberPanel:
Compatible with LiteSpeed: CyberPanel is designed to work seamlessly with LiteSpeed Web Server. LiteSpeed is known for its speed and efficiency in delivering web pages, which can enhance the performance of your websites. This integration allows CyberPanel to take full advantage of LiteSpeed’s capabilities to serve web pages faster than traditional servers.
Cost-Effective: Unlike cPanel, CyberPanel has a free version that is quite powerful and includes many features that are sufficient for most users. This makes it a budget-friendly option, especially for those just starting with VPS hosting.
User-Friendly: CyberPanel is also designed with simplicity in mind. It has a modern, easy-to-navigate interface that makes it simpler for someone who may not be very technical. Users can manage their websites, databases, and email accounts without needing to delve into complex configurations.
Runs on Linux: CyberPanel is built for Linux, which is the operating system most commonly used on VPS. Linux is known for its stability and security, which makes it a preferred choice for hosting environments.
cPanel:
While cPanel is incredibly popular and widely used, it typically requires a license purchase, which can be quite expensive compared to free alternatives like CyberPanel. It also works well with LiteSpeed but doesn’t have as tight an integration as CyberPanel does specifically with LiteSpeed.
In summary, if you are using a VPS with Linux and LiteSpeed, CyberPanel offers a cost-effective, user-friendly, and well-integrated solution for managing your server and websites, making it a compelling choice over cPanel for many users, especially those looking for a budget-friendly option.
What is LiteSpeed?
LiteSpeed is a type of web server software, which is a program that helps deliver content from websites to your browser. Think of it like a waiter at a restaurant. When you order a dish, the waiter goes to the kitchen to get it and then brings it to your table. Similarly, when you request a webpage, LiteSpeed retrieves the website’s data (like text, pictures, and videos) and sends it to your internet browser so you can see the website.
LiteSpeed is known for being very fast and efficient, which means it can serve up web pages quicker than some other web servers. It’s particularly good at handling lots of visitors at the same time, making it a popular choice for websites that expect a lot of traffic or want to load quickly for their visitors.
For setting up CyberPanel on a VPS with Ubuntu and LiteSpeed, you’ll need to have a few prerequisites in place. Here’s a detailed list of what you should have ready before starting the installation process:
Prerequisites for Installing CyberPanel in LiteSpeed Server:
A VPS with an Operating System Installed:
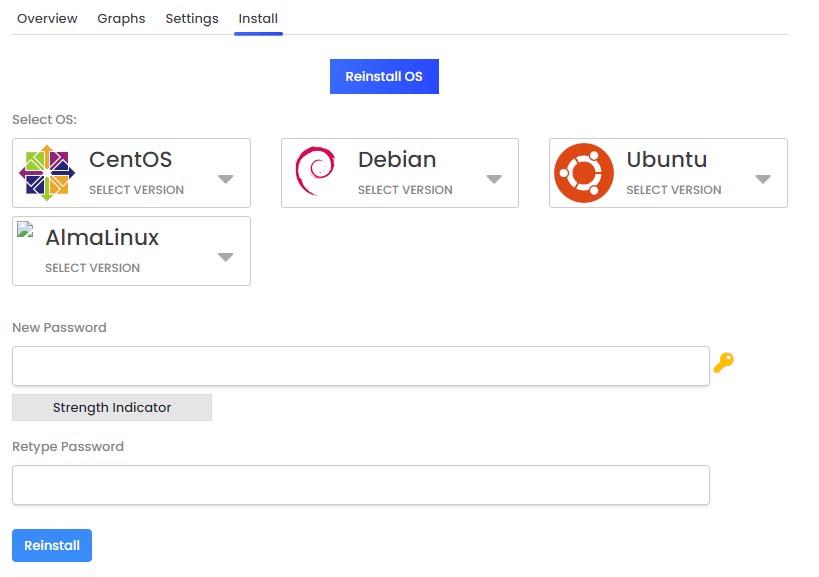
Litespeed server can be installed on Linux kernels 3.0 or higher, CentOS 7 or later, Ubuntu 18.04 or later, Debian 9 or later, and FreeBSD 12.04 or later. However, the latest version of CyberPanel does not support CentOS 7 (as of the time I am writing this, Apr 2024). Therefore, for compatibility with both LiteSpeed and the latest CyberPanel, I am installing Ubuntu as my operating system for the VPS. You can refer to the following links for more information on the system requirements:
Choose an operating system that is supported by both LiteSpeed and CyberPanel. Installing an OS in VPS hosting will not take much time as almost all the VPS plan backends have an option to install an OS with one click.
Option to install an OS in a famous VPS hosting plan backend
Root Access:
You will need root access to your VPS. This allows you to perform administrative tasks and install software. You should have the root username and password ready. You can find that in the email that you received during your VPS purchase.
SSH Client:
For Windows Users: Download and install an SSH client like PuTTY. This will allow you to securely connect to your VPS from your Windows computer. You can download PuTTY from https://www.putty.org/, but I will be using MobaXterm throughout this tutorial, which is available at https://mobaxterm.mobatek.net/. The Bash commands are the same for both.
For macOS Users: macOS comes with a Terminal application that can be used to SSH directly into your VPS.
Stable Internet Connection:
A reliable internet connection is necessary to download CyberPanel and other necessary software updates during the installation process.
LiteSpeed License (Optional):
If you plan to use the enterprise version of LiteSpeed Web Server, you need to purchase a license. However, CyberPanel works with both OpenLiteSpeed, which is free, and the enterprise version of LiteSpeed.
At least 2 GB of RAM:
Your VPS should have a minimum of 2 GB of RAM to run CyberPanel effectively, although more may be recommended based on your expected server load and the number of websites you plan to host.
Minimum 10 GB of Disk Space:
Ensure that your VPS has at least 10 GB of available disk space. This is necessary to install CyberPanel and any websites or applications you want to host.
Once these prerequisites are in place, you can proceed with the installation of CyberPanel, setting up a stable and powerful hosting environment on your VPS.
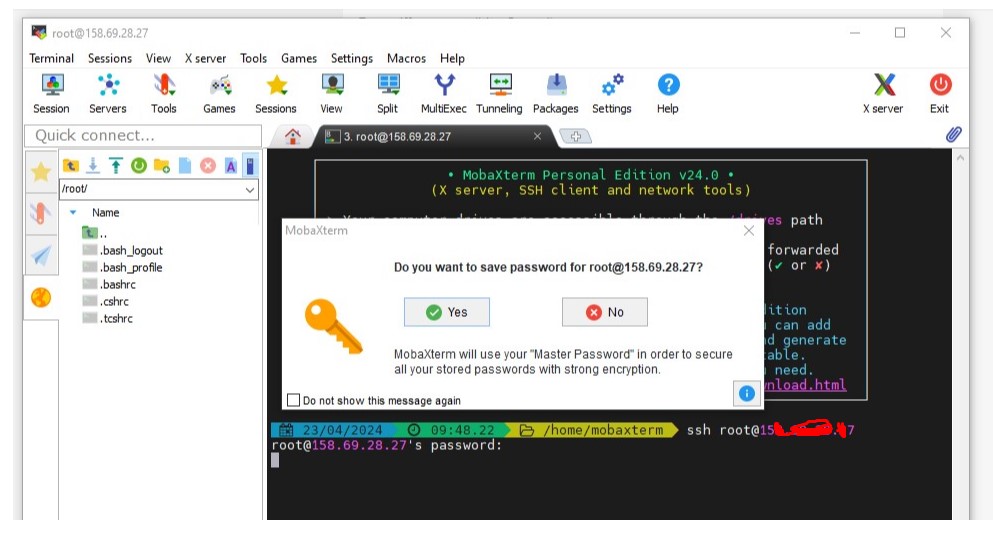
Step 1: Connect to Your VPS
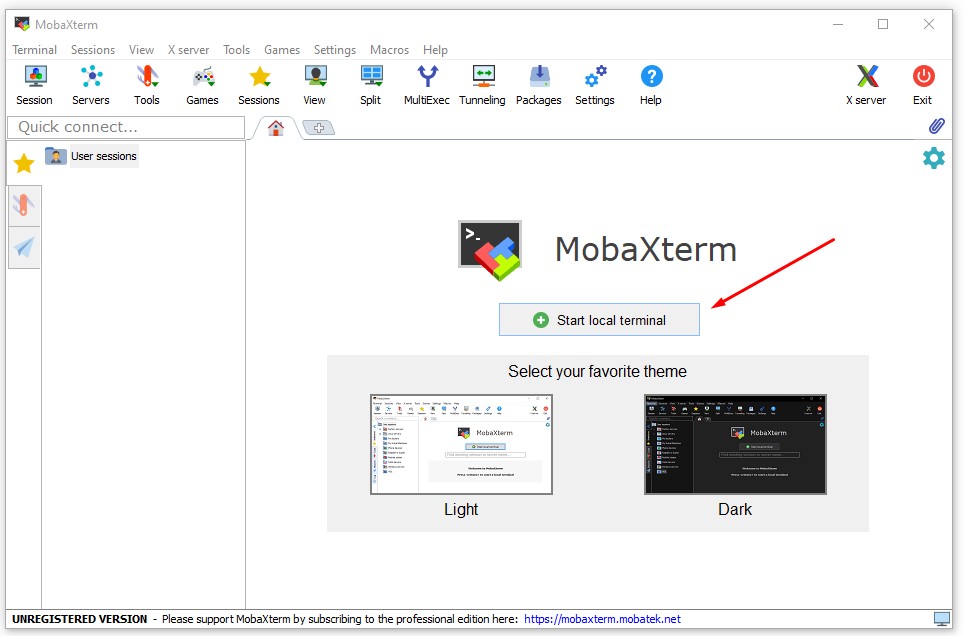
For Windows Users: Use an SSH client like PuTTY or MobaXterm to connect to your VPS. Enter your VPS’s IP address and port, typically port 22 for SSH.
Start Local terminal in MobaXterm
For macOS/Linux Users: Open the Terminal and use the SSH command:
ssh root@your_vps_ipssh root@your_vps_ip
Replace your_vps_ip with the actual IP address of your VPS. So it will look something like this: ssh root@123.12.12.17
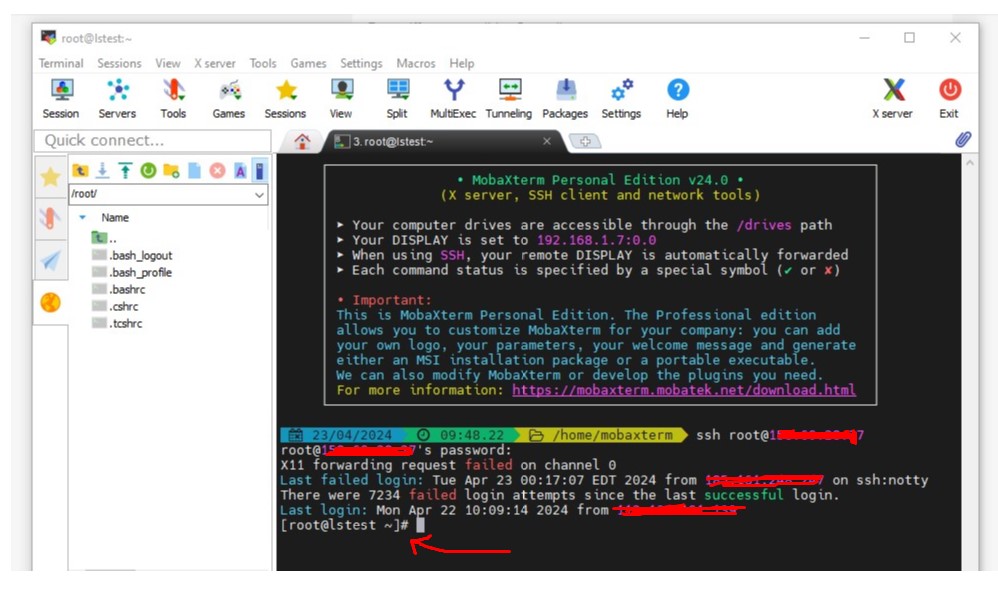
Enter and it will ask for the password enter your password as well (these were the credentials you received during your VPS purchasing welcome email). It will ask if you want to save the password for this connection. Normally I do not save.
After the successful connection, you will see it like this:
Step 2: Update the Packages
For Ubuntu: Run this command: sudo apt update && sudo apt upgrade -y
For Alma/Rocky:
yum check-update
yum update
Wait until the system finishes updating the packages. During this process, it may prompt you for confirmations and ask you to choose ‘yes’ or ‘no.’ Simply type ‘Y’ or ‘N’ and press the Enter key when prompted
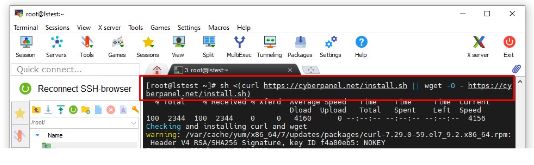
Step 3: Run the Installation Script
Now that you are logged in to your server and updated the necessary packages you can install CyberPanel and LiteSpeed.
Type in the command below. It will start an automatic installation process. You’ll be asked some questions about which LiteSpeed version and extras you want to install. This command checks if curl is installed; if not, it tries wget to download and run the CyberPanel installation script.
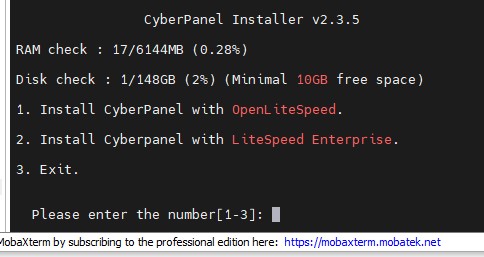
Choose the LiteSpeed version you want to install. If you choose LiteSpeed Enterprise, make sure you have a license key. While it’s free for one domain, you still need to get the key. Check the pricing table to decide on your preferred plan: https://litespeedtech.com/products If you choose LiteSpeed Enterprise, you will be prompted to enter your serial number. If you don’t have a license, you can use a trial license by typing ‘TRIAL’ if the server hasn’t used one before.
I’m choosing OpenLiteSpeed because it’s sufficient for demonstrating the tutorial steps and is ideal for beginners.
Step 5: Select Options and Add-ons
You will be presented with a series of prompts for different options and add-ons that are available. These include:
For all subsequent prompts, you can choose the ‘Default’ option. When prompted for the CyberPanel version, simply press the ‘Enter’ key to install the latest version. You don’t need to specify a particular version unless you have a specific requirement.
Step 6: Installation
The installation process will kick off automatically and will take approximately 5-10 minutes. The speed of your server will determine how quickly this will be completed.
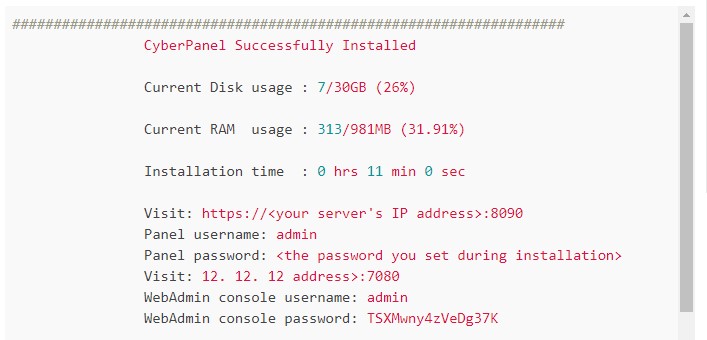
By the end of the installation process, you will get the details to log in to your CyberPanel including your randomly generated Cyber Panel password.
Let’s say your IP address of the VPS is 12.12.12.21then your CyberPanel login URL will be 12.12.12.21:8090 You can log in there using the panel username and panel password that you get in the last step of the installation.
Step 7: Restart the Server
After entering the login details, you’ll be prompted:
Would you like to restart your server now? [y/N]:
Enter ‘y’ to restart immediately. Alternatively, you can enter ‘reboot’ later after completing any other desired operations.
Step 8: How to Confirm LiteSpeed was installed correctly or not.
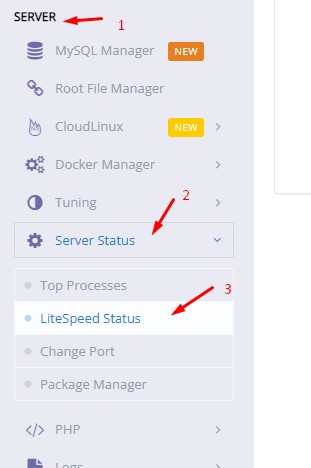
Log in to the cyber panel using the credentials you got by the end of the installation
Scroll down to the section Server > Server Status
Click on LiteSpeed Staus
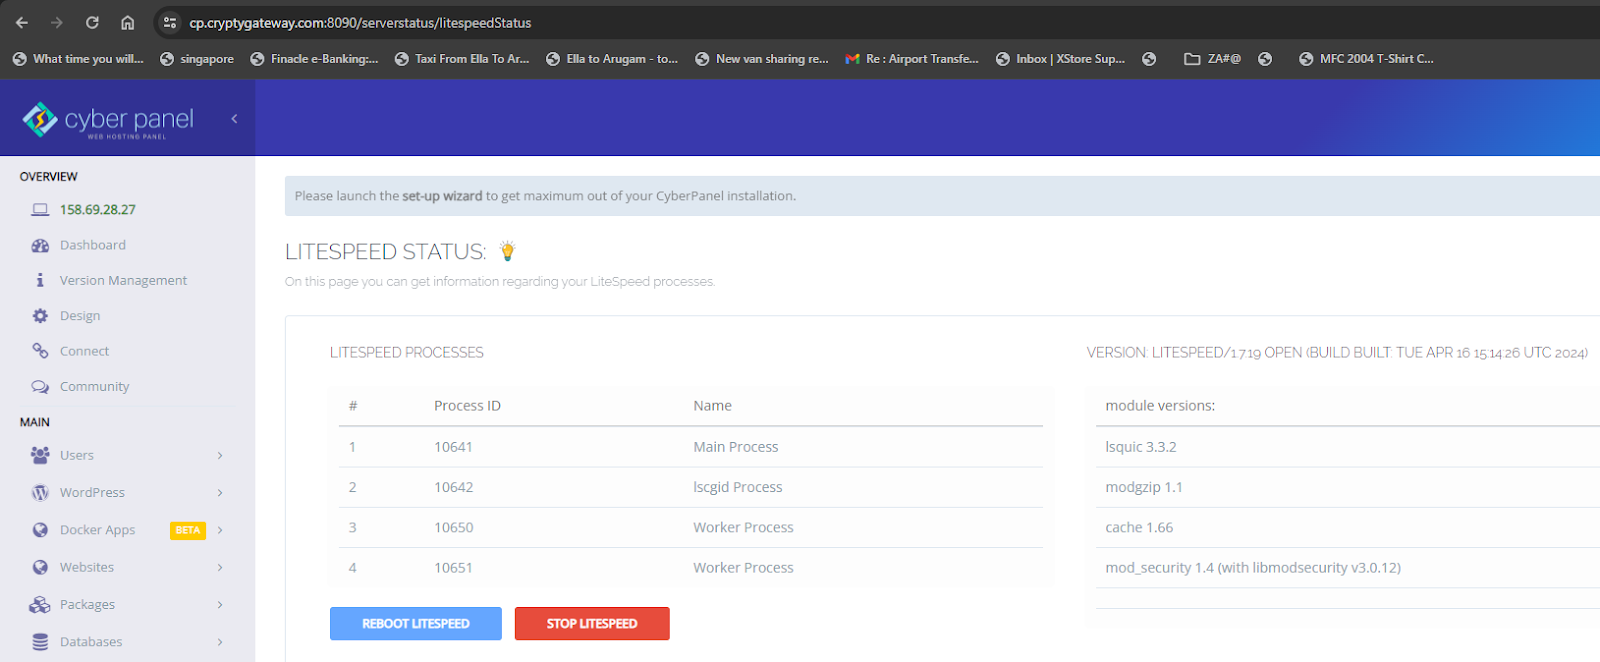
You can see your LiteSpeed server status there
If you’re still connected to SSH and want to use another one-liner of Bash code to check this, run the following command:
/usr/local/lsws/bin/lswsctrl status
This command will display the current status of the LiteSpeed web server. If LiteSpeed is running, it will show as “running”; if it’s stopped, it will show as “stopped”. If you see any of these messages that means your VPS has LiteSpeed webserver now.
Congratulations! You have successfully installed CyberPanel on your Ubuntu or on the the OS you’ve selected with LiteSpeed. You are now ready to host your websites, set up email accounts, and much more. CyberPanel makes web hosting easy and efficient, even for non-technical users, while LiteSpeed helps deliver website resources faster.
Step 9: How to make the most from LiteSpeed Web Server?
Once you’ve successfully installed the LiteSpeed webserver along with CyberPanel, there are several steps you can take to ensure that you are making the most out of its capabilities. LiteSpeed is known for its performance and efficiency, especially in handling high traffic and reducing server load. Here are some recommendations to optimize and secure your setup. These steps may require further explanation for better understanding. I plan to create additional blog posts and tutorials soon to explain these concepts in an easier way for non-technical users
1. Enable LSCache
LiteSpeed’s caching solution, LSCache, is one of the most effective tools to enhance your website’s loading speed. If you are using CMSs like WordPress, Joomla, or Drupal, make sure to install the respective LSCache plugins for those applications.
Adjust the PHP settings through CyberPanel to match the needs of your applications:
Increase memory_limit and upload_max_filesize if you’re running large applications or uploading big files.
Adjust max_execution_time as per the requirement of your scripts.
3. Configure SSL/TLS
Securing your website with HTTPS is crucial. LiteSpeed makes it easy to set up SSL/TLS:
Use the AutoSSL feature in CyberPanel which provides free SSL certificates from Let’s Encrypt.
Ensure that all traffic is redirected from HTTP to HTTPS to secure all connections.
4. Set Up HTTP/3
LiteSpeed supports HTTP/3, the latest version of the HTTP protocol, which provides improved performance. Make sure it’s enabled to enhance the loading times for users on supported browsers.
5. Utilize Web Server Security Features
LiteSpeed has built-in security features that help protect your server:
Configure ModSecurity, a web application firewall, to protect your websites from various attacks.
Use the built-in anti-DDoS settings to mitigate the impact of distributed denial-of-service attacks.
6. Implement Content Delivery Network (CDN)
Integrating a CDN can significantly reduce the load on your LiteSpeed server and improve global access speeds:
Set up a CDN like Quic Cloud or Cloudflare to serve static content (images, CSS, JavaScript) from locations closer to your users.
LiteSpeed supports both GZIP and Brotli compression. Enabling these can reduce the size of the data sent from your server to the user, which improves load times and reduces bandwidth usage.
8. Monitor Server Performance
Regular monitoring of your server’s performance can help identify potential issues before they become serious problems:
Use LiteSpeed’s built-in monitoring tools to keep an eye on traffic, server load, and resource usage.
9. Keep Software Up to Date
Ensure that your LiteSpeed server, CyberPanel, and all applications (especially CMSs) are regularly updated to the latest versions. This helps in maintaining security and performance.
10. Configure Backups
Set up regular backups for your server to prevent data loss in case of hardware failure or security breaches. CyberPanel offers easy options for scheduling backups.
Implementing these steps will help you maximize the efficiency, performance, and security of your LiteSpeed webserver. Each step contributes to a robust and responsive web hosting environment, providing a better experience for both you and your visitors.
Ps:
If you’re interested in my expertise for your business or projects, or if you would like to hire me full-time or part-time you can reach me using the contact form located at the bottom of this site.
If you’re a digital marketer working in a small or startup company, you might find yourself handling everything from graphic design and #scriptwriting to video shooting and editing, not to mention creating SEO-friendly #websites. Essentially, you’re doing the work of an entire team or department on your own. Yet, often, you’re compensated with a salary that reflects just a single role. But that’s a story for another time. 🙂
Normally, creating a #website or outsourcing the task can be quite costly. However, if you have at least a basic understanding of how to create a WordPress site, you can reallocate that budget elsewhere.
I’m here to help you grasp the fundamentals of #WordPress site creation, and I’ll guide you through crafting the perfect WordPress site. To achieve this, I will be creating a series of tutorial blog posts dedicated to WordPress websites.
In this post, we’ll explore how mastering WordPress can benefit a digital marketer or enhance your skills in the digital marketing field.
Diving into WordPress might just be the game-changer you need, even if you’re not a coding guru. Let’s explore how adding WordPress skills to your repertoire can skyrocket your credibility and value in the digital #marketing sphere.
1. Beyond the Developer Tag
It’s an open secret in our industry: some web designers and WordPress agencies boast about being engineers and developers when, in reality, they’re leveraging the same non-developer WordPress skills we’ll explore. These skills are powerful, enabling you to create, optimize, and manage websites without deep coding knowledge.
2. Empowerment and Independence
By mastering these WordPress skills, you’ll not only boost your marketing strategies but also bring significant cost savings and efficiency improvements to your organization. Imagine cutting down on external consultancy fees or reducing the time spent waiting for technical tweaks. Yes, these skills can make that possible!
3. A Bridge Between Technical and Creative
Understanding WordPress bridges the gap between technical know-how and creative marketing. You’ll gain insights into the nuts and bolts of web functionality, which can enrich your strategic thinking and enable you to craft more effective campaigns.
4. Enhanced Collaboration
When you speak the language of WordPress, you can communicate more effectively with developers and designers. This synergy can lead to more cohesive and innovative digital projects, amplifying your marketing results.
5. Trust and Credibility
When clients or employers know you can handle WordPress, they’ll see you as a versatile and resourceful digital marketer. This added layer of trust enhances your professional image and can open doors to new opportunities and collaborations.
6. Stay Ahead of the Curve
WordPress is ever-evolving, with new features and plugins constantly emerging. By staying up-to-date, you can harness the latest tools to keep your marketing strategies fresh and effective, setting you apart from the competition.
7. Cost-Effective
By managing WordPress sites, you can cut down on outsourcing costs for your clients or your organization, providing value and demonstrating your commitment to maximizing resources.
8. The SEO Advantage
A solid grasp of WordPress means you can directly implement SEO best practices, ensuring that your content reaches its target audience effectively and enhances your overall marketing efforts.
So, dear digital marketers, by embracing WordPress, you’re not just adding another skill to your CV—you’re empowering yourself with a versatile tool that can enhance every facet of your digital marketing strategy, making you a more autonomous, innovative, and valuable professional in the digital realm.
A Word of Encouragement
Now, here’s something important to remember: even if you arm yourself with these skills and start making a tangible impact, you might still encounter skepticism. Some bosses (not leaders), especially those fixated on numbers or lacking a deep understanding of digital marketing nuances, might not immediately see your value. If you find yourself in this situation, remember – their perception does not define your worth or the effectiveness of your skills.
Remember, in a world where some might not recognize your contributions, your knowledge, and ability to adapt and save resources are invaluable assets. If someone who’s more about spreadsheets than innovation fails to see your value know that it’s their limitation, not yours.
Stay empowered, stay innovative!
Are you a digital marketer or a WordPress expert? How are you utilizing these skills in the digital marketing realm? Let me know in the comments section.
Ps:
If you’re interested in my expertise for your business or projects, or if you would like to hire me full-time or part-time you can reach me using the contact form located at the bottom of this site.
I am currently looking for a full-time remote job. In the meantime, I am also available for any freelancing work within my expertise, which you can find in my contact form
** If you are considering employing me for a traditional office job, I would be open to it if offered a fair salary and if the job is located in a country I prefer.