A real-world onboarding journey showing what engineers actually do and learn, step by step, from setup to debugging.
Introduction
Day 1 marks the start of the technical phase of this onboarding journey. Today’s focus was on building a consistent development environment, the foundation that every support engineer needs before working on real-world issues.
Even after years of experience in WordPress support and plugin development, I found this phase refreshing. It reminded me that structured setup and common tooling standards are what make a team’s debugging and deployment workflow faster and more predictable.
This post documents how I aligned my own environment with the agency (I joined) recommended stack from installing NVM and Composer to configuring Z Shell and LocalWP in a hybrid style that shares both steps and real-world insights.
Tools Installed & Configured
1. NVM & Node.js (v22.11.0)
- Installed Node v22.11.0 using NVM for version control.
- I followed this tutorial to install NVM first: https://www.freecodecamp.org/news/node-version-manager-nvm-install-guide/ (NMV Windows)
- Verified installation with
node -vandnpm -v.
I ran into an interesting error when I tried to install Node js. The error was
'node' is not recognized as an internal or external command
After the succesful Node installation when I ran
node -v
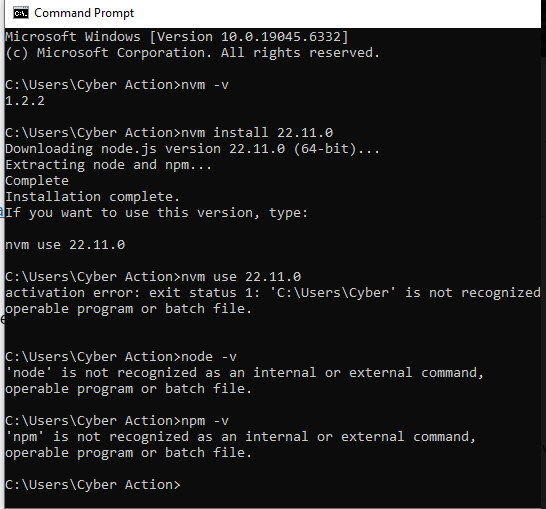
Fixing NVM setup on Windows
I realised I ran into activation errors due to spaces in my user folder name (C:\Users\Cyber Action).
To fix it, I:
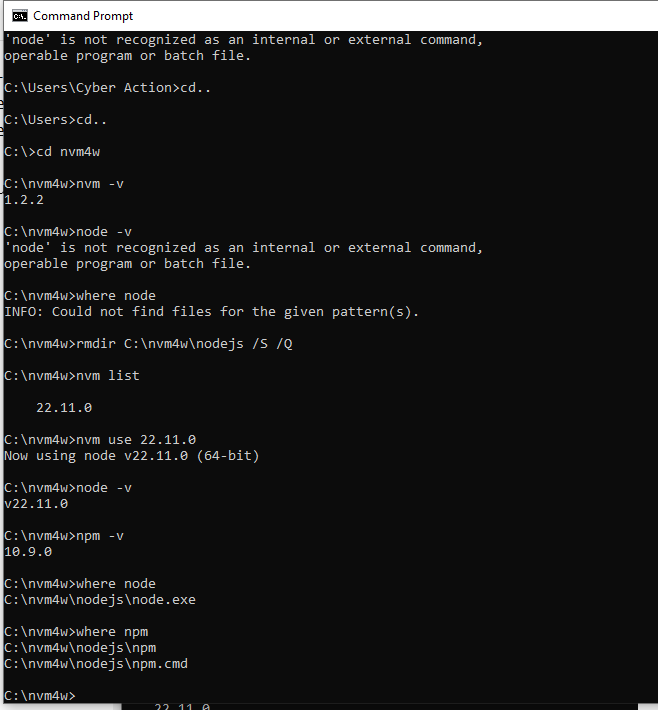
1. Created new folders:
C:\nvm4w
C:\nvm4w\nodejs
2. Updated settings.txt at C:\Users\Cyber Action\AppData\Local\nvm\settings.txt to:
root: C:\nvm4w
path: C:\nvm4w\nodejs
3. Deleted the physical C:\nvm4w\nodejs folder, then re-ran:
nvm install 22.11.0
nvm use 22.11.0
4. Verified everything with:
node -v
npm -v
where node
where npm
Output confirmed Node 22.11.0 + NPM 10.9.0 working under C:\nvm4w\nodejs\.
- Benefit → Keeps global packages clean and allows easy switching between versions for different projects.
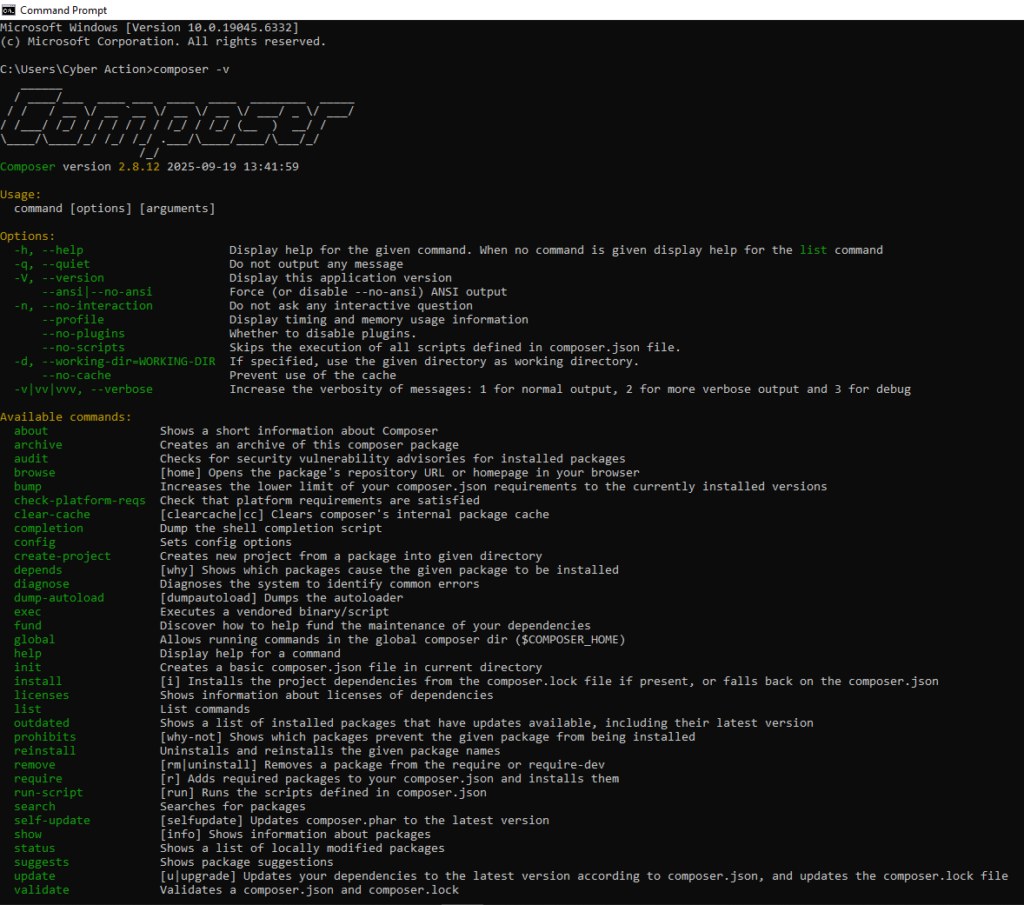
2. Composer
- Installed the latest Composer globally. Followed this: https://getcomposer.org/
- Tested setup with
composer -V. - Confirmed autoloading paths work with WordPress plugin structures.
What is Composer and Why It Matters
Composer is a dependency manager for PHP – it helps you install, update, and manage PHP packages or libraries that your project needs.
Instead of manually downloading ZIP files or copying PHP libraries, Composer automatically installs and keeps them updated through a file called composer.json.
For WordPress engineers, Composer is especially useful for:
- Installing tools like PHP_CodeSniffer and WordPress Coding Standards (WPCS).
- Managing third-party PHP libraries for plugins or themes.
- Keeping local development environments consistent across projects.
Think of it as your project’s package manager, similar to npm for Node.js but for PHP.
3. WGET
Installing wget on Windows
I installed wget using:
winget install wget
This will install the wget regardless your region’s Microsoft Store source.
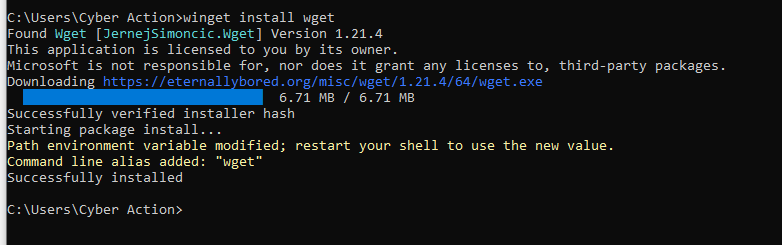
After installation, I restarted the terminal to refresh the PATH variable.
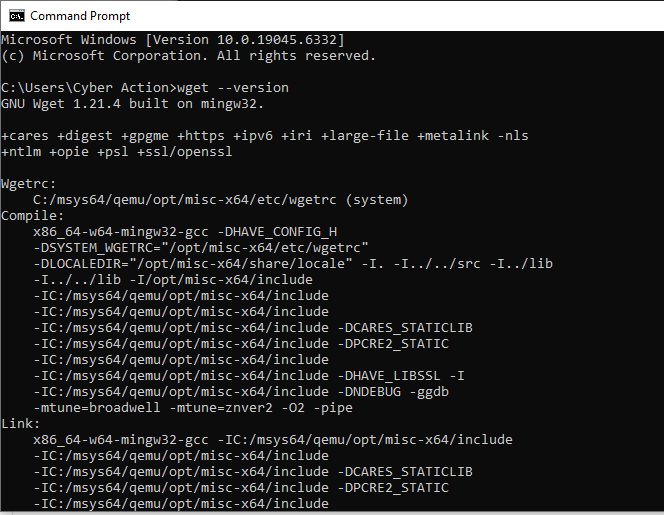
Verified it with:
wget --version
What is wget and Why We Need It
wget (pronounced “web-get”) is a command-line tool used to download files or data directly from the internet using HTTP, HTTPS, or FTP.
You can think of it as:
“A downloader for developers like using a browser’s Save As… button, but from your terminal.”
Why It’s Useful for WordPress or PHP Developers
- Fast setup: You can grab files, scripts, or archives without opening a browser.
wget https://wordpress.org/latest.zip⮕ Downloads the latest WordPress ZIP instantly into your current folder. - Automation:
wgetworks in setup scripts so you can automatically install or update tools like:wget https://getcomposer.org/installer -O composer-setup.php php composer-setup.php - Headless servers: When you work on servers (e.g. via SSH), there’s no browser but
wgetlets you fetch what you need. - Training workflows: In software or web companies onboarding, it’s used in scripts that install or update dependencies (Composer, PHPCS, etc.), ensuring everyone has the same setup.
Further readings: https://formulae.brew.sh/formula/wget
4. Git & GitHub CLI
Version control is a key part of any technical or support workflow.
Even if we don’t write production-level code daily, knowing Git helps us clone customer sites, test fixes, and push changes when collaborating with development teams.
Installing Git
Start by installing Git for Windows from git-scm.com/download/win.
During installation, keep the default settings but make sure to select:
“Git from the command line and also from 3rd-party software.“
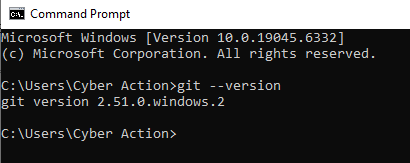
After setup, confirm Git works:
git --version
Expected output:
git version 2.46.0.windows.1
Installing & Linking GitHub CLI
Next, install GitHub CLI from cli.github.com.
This command-line tool helps manage repositories, pull requests, and issues directly. Ideal for plugin or theme support workflows.
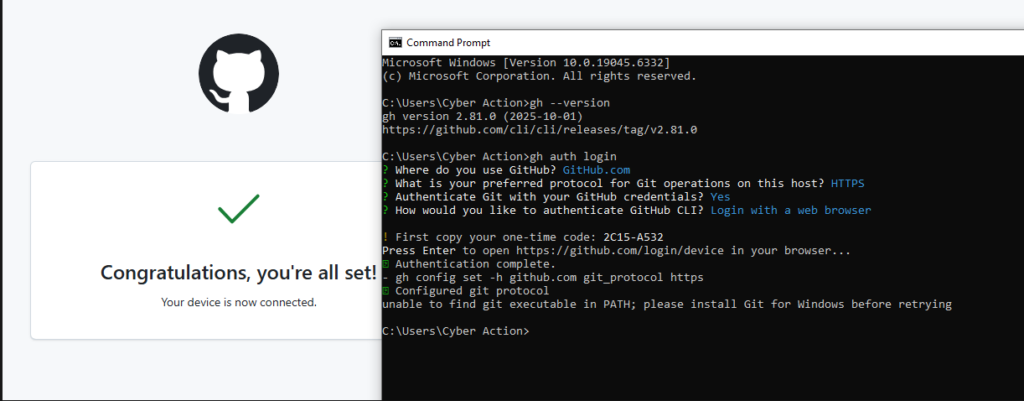
After installing, verify it:
gh --version
Then run:
gh auth login
Follow the prompts:
- Choose GitHub.com
- Select HTTPS
- Choose Yes for Git authentication
- Pick Login with a web browser
Your terminal will show a short code like 2C15-A532 and open a page asking you to confirm the login.
Enter that code and authorize access.
You’ll see:
✓ Authentication complete. Logged in as riffaz
However, if you see this message:
unable to find git executable in PATH; please install Git for Windows before retrying
It simply means GitHub CLI detected no Git installation.
Just install Git from git-scm.com as shown above, then re-run:
gh auth status
It should now confirm:
✓ Logged in to github.com as riffaz
✓ Git operations for github.com configured to use https protocol.
Why this matters
This combination of Git and GitHub CLI allows technical engineers to:
- Clone or fork repositories for debugging.
- Reproduce or verify issues reported by customers.
- Track commits, branches, and pull requests directly from the terminal.
Together, they form the foundation for collaborative, code-aware technical support.
5. Setting up Local Development Environment
For a WordPress Technical Support Engineer, having a local development environment is essential. It lets you reproduce client issues safely, test fixes before deploying them, and experiment with plugins or code without affecting live sites.
You can set up a local environment using tools like LocalWP, Lando, or wp-env.
Since I’m on Windows, I used LocalWP, which is the simplest and most stable option for WordPress development.
🔧 Step 1 – Install LocalWP
- Go to https://localwp.com
- Download the Windows version and install with default settings.
- No special configuration is needed — just launch the app after installation.
⚙️ Step 2 – Create Your First Test Site
Once installed:
- Open LocalWP
- Click “Create a New Site”
- Name it something like
test1(I used this name for my setup) - Choose Preferred Environment (PHP 8+, MySQL 8+, Nginx or Apache — defaults are fine)
- Set up your WordPress admin credentials (for test use, I used
admin / admin) - Once setup completes, click “Open Site”
Your new WordPress site should now open at something like:http://test1.local
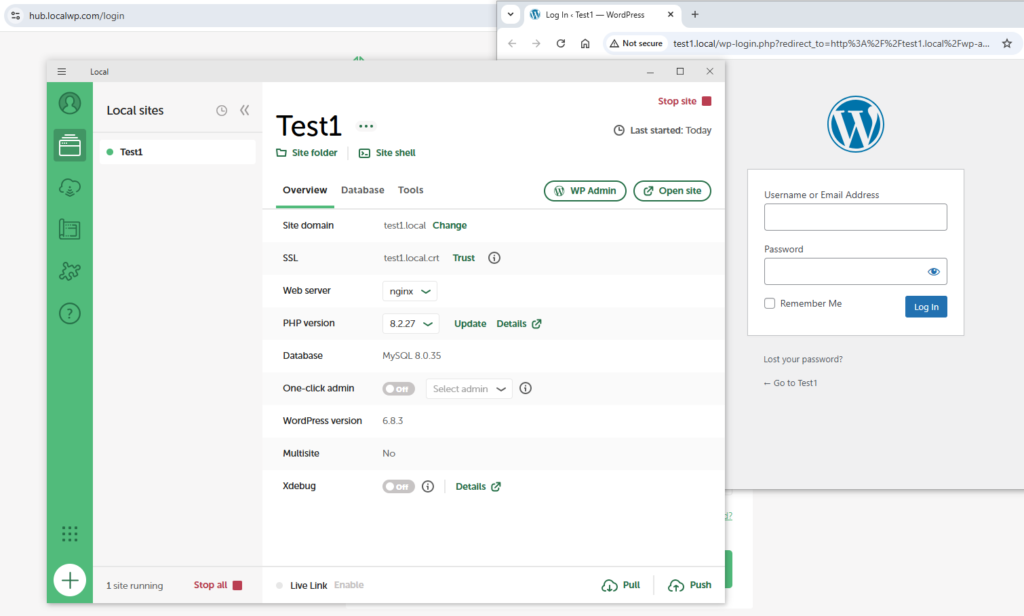
🧠 Step 3 – Verify Everything Works
LocalWP automatically installs PHP, MySQL, and WP-CLI.
After creating your site in LocalWP, you’ll see it listed in the left sidebar.
Click on your site name (for example, Test1). This opens the site overview screen.
At the top of this screen, right below the site name, you’ll find two links:
Site folder | Site shell
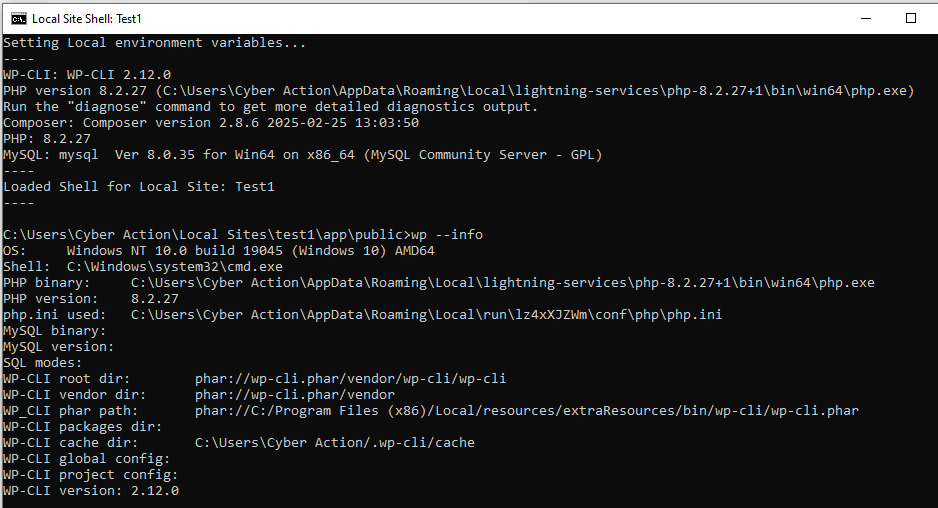
Click “Site shell” — it will open a terminal window (Command Prompt or PowerShell) connected directly to your local WordPress environment.
From there, you can run commands like:
wp --info
to confirm WP-CLI is working and properly connected to your site.
🧩 Step 4 – Optional: Install a Test Plugin
To confirm everything is working smoothly, I installed Query Monitor, a debugging plugin often used in support:
wp plugin install query-monitor --activate
Then I logged into wp-admin and confirmed it appeared under “Plugins.”
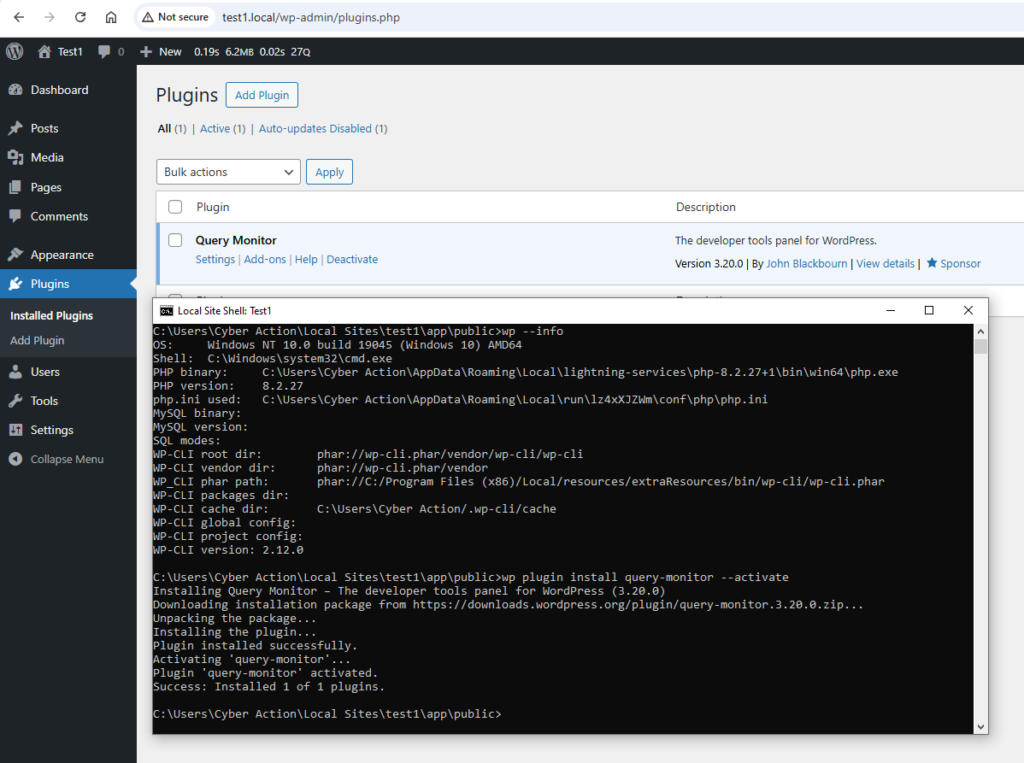
Everything worked perfectly on the first run.What I learned today
Even after years of working with WordPress, I realized how valuable a structured environment setup really is. Following a step-by-step onboarding flow helped me see why each tool matters. Not just how to install it.
- NVM keeps Node.js versions isolated for each project.
- Composer manages PHP packages cleanly for reproducible setups.
- GitHub CLI streamlines repo access and authentication from the terminal.
- LocalWP provides a stable, production-like WordPress environment in minutes.
One key takeaway for Windows users: if your username contains spaces, tools like npm may fail. Setting up a clean path or using a short folder name avoids those hidden headaches.
This approach ensures a reliable, scalable workflow for WordPress development and debugging whether you’re building themes, plugins, or managing client sites.